Today, we’re excited to explore a game-changing function that enhances the versatility of your Planning Analytics platform. Imagine a tool that not only streamlines your data processes but also connects your Planning Analytics seamlessly with external systems. This innovation allows you to execute HTTP requests directly within your TurboIntegrator (TI) processes, transforming your Planning ...
- Unlocking the power of IBM Planning Analytics with execute HTTP request
- Smarter Cube Views in IBM Planning Analytics Workspace 3.1.3
- Agentic AI in Finance & TM1: Why Everyone’s Suddenly Talking About It
- Transforming Finance with Generative AI
- 8 Forces Reshaping the Future of Finance
- IBM Planning Analytics: Debugging and database explorer updates
Today, we’re excited to explore a game-changing function that enhances the versatility of your Planning Analytics platform. Imagine a tool that not only streamlines your data processes but also connects your Planning Analytics seamlessly with external systems. This innovation allows you to execute HTTP requests directly within your TurboIntegrator (TI) processes, transforming your Planning Analytics into an integral part of your interconnected ecosystem. Join us as we delve into the possibilities this function brings and how it can elevate your data management strategies to new heights.

Why Execute HTTP Request is a Game-Changer
What makes this function truly versatile is its ability to connect with any external system that supports APIs. The only limit is your imagination and the capabilities of the APIs you wish to connect to. Integrating Planning Analytics with external systems allows developers to break free from traditional limitations and extend the functionality of their applications.
This session will include practical demonstrations of several use cases that highlight the power of the Execute HTTP Request. By the end, I hope to inspire you to explore how you can leverage this function to enhance your TM1 applications and workflows.
Demo 1: Hot Promotion of Objects Between Instances
Let's dive into our first demonstration on how to perform hot promotion of objects from one instance to another. Traditionally, migrating objects between instances involved shutting down the target server. However, using the Execute HTTP Request, we can do this in real-time.
- Setting Up the TI Process:
- Open the workbench in your workspace and create a new TI process.
- Declare necessary constants and set your source and target instances (e.g., SmartCo to Demo Server).
- Use of HTTP Execute Request:
- Fetch dimensions from the source instance and check for their existence in the target instance.
- For non-existing dimensions, save them as JSON files and use the HTTP Execute Request to migrate them to the target instance.
Let’s execute this process! Once completed, you’ll see that the dimensions have been successfully migrated.
Demo 2: Executing a Process Across Instances
Next, we'll demonstrate the ability to execute a process from one instance in another:
- Migrate TI Processes:
- Similar to dimension migration, retrieve the TI process (like Sample TI) from the source instance and save it as a JSON file.
- Execute the TI Process:
- Use the Execute HTTP Request to trigger execution from the target instance while utilising its response to capture status codes and log outputs.
After running this process, you should see that both the processes have been migrated and executed successfully.
Demo 3: Loading Currency Conversion Rates
In this demo, we will load real-time currency conversion rates from a website using its API:
- Call the API:
- Set up an HTTP GET request to retrieve USD conversion rates.
- Extract and Utilise Data:
- Capture the JSON response and extract required currency rates using JSON functions.
-1.png?width=457&height=90&name=image%20(2)-1.png)
Run the process, and you will observe the real-time conversion rates being fetched and displayed.
Demo 4: Sending Teams Notifications
Next, I’ll show you how to send automated notifications to Microsoft Teams:
- Integrate with Microsoft Power Automate:
- Set up a Power Automate flow to send notifications.
- Trigger Notification from System:
- Use Execute HTTP Request to trigger alerts in Teams based on process execution results.

After execution, you should see notifications appear in your Teams channel.
Demo 5: Sending Emails via HTTP Requests
Finally, we'll explore how to send emails:
- Power Automate for Email Notifications:
- Again, set up Power Automate to manage email sending through appropriate HTTP requests.
- Dynamic Email Content:
- Utilise dynamic fields for subject and body based on execution results.
After executing this process, you will receive the email in your mailbox.
Conclusion
Today, we have unlocked the extensive capabilities of the Execute HTTP Request function in IBM Planning Analytics. We showcased hot promotion between instances, cross-instance process execution, real-time data fetching, as well as integration with Microsoft Teams and email notifications.
Thank you all for attending this session. I hope you found it beneficial and feel inspired to explore the functionality of Planning Analytics further. Let’s move toward a more integrated and dynamic future in our analytics processes!
Introduction
IBM Planning Analytics Workspace 3.1.3 has made a noticeable difference to how I work with cube views every day. Instead of dragging views around and hoping I do not overwrite something important, I now use the built-in view selector to switch between different saved views in seconds.
With Undo and Redo available directly in the cube view, it feels safe to try new layouts, pivots, and filters because I can always step back if the result is not what I expected. Together, these changes reduce friction in my analysis, keep my report layouts intact, and help me move much faster from “idea” to “answer".
Part 1: From Drag-and-Drop to Smart View Selection
Before 3.1.3
Analysts had to drag views from the left panel onto the grid, risking accidental overwrites and losing custom filters and formatting with each swap. Finding the right view in a cluttered list of auto-generated names wasted time. Or they can click on three dots and click on ‘Add View’

Now in 3.1.3
The new View selector dropdown lets you switch views instantly while preserving layout, filters, and formatting. Search by keyword to find relevant views fast.

Key benefits:
-
Layout stays intact when switching views
-
Fast scenario comparisons (Actuals → Budget → Forecast)
-
Searchable view list for large libraries
Part 2: Undo and Redo for Cube Views
Before 3.1.3
Changes to cube explorations were permanent. Pivoting dimensions, reordering members, or adjusting filters felt risky, so modelers hesitated to experiment and often retreated to Architect.
Now in 3.1.3
Native Undo/Redo buttons on the toolbar let you experiment safely. Move dimensions, adjust filters, and reorder members with confidence—revert instantly if needed.

What you can undo/redo:
-
Move dimensions between context, rows, and columns
-
Expand/collapse hierarchies
-
Apply/remove filters
-
Reorder dimensions
Quick Wins
-
For report builders: Use the view selector to build flexible reports; users switch views at runtime.
-
For modelers: Experiment freely with Undo/Redo; refine layouts through rapid iteration.
Conclusion
-
Planning Analytics Workspace 3.1.3 simplifies cube view workflows with a smart view selector and Undo/Redo. These features accelerate analysis, reduce friction, and help teams transition confidently from legacy tools to modern Workspace.
-
Enabling the cube viewer switcher needs to be done for each view separately, which is a drawback. It would be good to have a universal configuration for enabling it for all the views.
References
[1] IBM. What's new in modelling – 3.1.3. IBM Documentation, 2025. https://www.ibm.com/docs/en/planning-analytics/3.1.0?topic=2025-whats-new-in-modeling-313
[2] IBM. What's new in Planning Analytics Workspace 3.1.x? IBM Documentation, 2025. https://www.ibm.com/docs/en/planning-analytics/3.1.0?topic=workspace-whats-new-in-planning-analytics
If you’re a TM1 professional and have been near the finance or FP&A world lately, you’ve probably heard the buzzword of the season: Agentic AI.
It sounds fancy and must have wondered why suddenly everyone is talking about it, but honestly, it’s just AI that doesn’t sit around waiting for you to poke it. It does things — proactively and automatically.
And when you mix that with platforms like IBM Planning Analytics / TM1, things start getting interesting.

So… What Exactly Is Agentic AI?
Imagine if your TM1 rules, processes, and chores had a brain.
Not just “if X then Y”, but something that can:
-
Notice something’s off
-
Decide what to do
-
Do it
-
Tell you what it did
-
Learn from the outcome
That’s, in a nutshell, agentic AI in the TM1 paradigm.
Think of it as giving your FP&A stack its own mini team member — minus the coffee breaks or the usual shenanigans that you’ve to bear with daily.
In practical terms, agentic AI can help rather than just be a buzzword decoration floating around in everyone’s LinkedIn posts or formal/informal conversations.
I like to highlight below a few basic things - yet very important – that agentic AI is really good at doing:
1. Automated Data Babysitting (Finally!)
Every TM1 admin knows the pain: source system changes, missing records, late files… chaos.
Agentic AI can:
- Watch data pipelines for delays
- Fix formatting issues on the fly for your TI process
- Alert you before the morning refresh explodes
Basically, your nightly chore is that you just hired an assistant.
2. “Hey, Something’s Wrong” Alerts (That Make Sense)
Instead of a typical TM1 process error message that looks like it was written in 1995, agentic AI can:
- Spot outliers, bad allocations, weird spikes – something you would do manually otherwise
- Compared to historical patterns
- Tell you, in plain English, why it’s weird
Something along the lines of:
“Hey, sales in APAC are 4x higher than normal for Mondays. It could be a missing filter. Want me to check?”
Yes, please.
3. Forecasting That Doesn’t Feel Like Guesswork
Sure, TM1 can forecast, and it can predictive forecast really well.
But agentic AI can simulate scenarios on its own and recommend the best one.
Examples:
- Auto-build 20+ what-if scenarios
- Rank them based on risk or probability
- Push the best one straight into a cube
It’s like giving your CFO a crystal ball… a slightly nerdy one.
4. TM1 Admin Tasks… Done Automatically
This is the part TM1 developers love.
Agentic AI can:
-
Fix failing processes
-
Rewrite TurboIntegrator code
-
Clean up unused object
-
Suggest how to reduce the cube size
Admittedly, given it's all subjective, and it's easier said than done, but the possibilities do exist with the more quality data we can ingest and the more we can train the model.
5. Natural Language Access to TM1
We’ve already seen this with AI chat Assistant in PAW where instead of navigating a million cubes and views, we can prompt Planning Analytics such as, “Give me gross margin by product for Q3 vs last year and show me drivers of variance.”
And it does it a fine job.
No view-building. No subset drama. No filter pain.
6. Real-time Decision Automation
Finance teams love workflows and agentic AI is perfect for building the workflows.
It loves automating those workflows.
-
Approve expenses based on policy
-
Kick off TM1 processes when thresholds hit
-
Trigger emails, Teams alerts, Slack actions
-
Update commentary automatically
So instead of actively entering the forecasts or budgets, the agent proactively taking steps to initiate those steps for you.
With time, we’re only going to see more of:
-
AI agents running close cycles
-
AI agents building dashboards
-
AI agents talking to ERP, CRM, S3, APIs without humans touching integrations
-
AI agents are debugging your model while you sleep
Why TM1 Specifically Is a Perfect Fit
As we know, TM1 is:
-
Real-time
-
Calculation-heavy
-
Highly scriptable
-
Connected to everything
-
Used for tons of repetitive work
Which is exactly the playground where agentic AI thrives.
Plus, TM1 developers are already half-cyborg 😉 with the stuff they automate — agents just take it further.
So the biggest takeaway from all of this is that Agentic isn’t coming “in the future”, it's already there! Things are definitely moving and moving at a very fast rate in this space.
It’s already sliding into FP&A tools, APIs, planning models, and the daily grind of finance teams. If TM1 was the engine, then agentic AI is the turbocharger bolted on top.
And yes — as a disclaimer, it might even finally stop your chore from failing at 3 AM for no reason 😉
In a recent project with a leading media company in Australia, we set out to demonstrate how IBM Watsonx Orchestrate can revolutionise finance operations through the power of Generative AI. The Commercial Finance team, under constant pressure to deliver timely, accurate and insight-rich reports, needed a smarter way to move beyond manual data wrangling and deliver executive-ready outputs in record time.
.png?width=530&height=304&name=Alan%20blog%20(1).png)
That’s where WatsonX Orchestrate came in. Unlike traditional BI or workflow automation tools, Watsonx Orchestrate leverages Generative AI to not only automate repetitive tasks but also to interpret, contextualise and generate meaningful outputs. The result is a system that empowers both analysts and executives to act faster, with confidence, while minimising human bottlenecks.
Automating Financial Report Generation
Key Capabilities:
-
Automated extraction, transformation and loading (ETL) of data from a data warehouse.
-
Automated generation of third-party and monthly executive summary reports.
-
AI-driven identification of key events influencing financial outcomes.
-
Analyst verification loop to ensure accuracy and compliance.
Business Impact:
-
Reports created in minutes rather than weeks.
-
Reduced data duplication and inconsistencies.
-
Analysts free to focus on high-value strategic analysis.
-
Executives receive timely, validated insights for faster decision-making.
Self-Service Financial Insights
Key Capabilities:
-
A bespoke AskFinance portal enabling natural language queries.
-
Secure access aligned with role-based permissions.
-
Pre-trained CFO scenarios to simulate executive decision contexts.
-
Integrated visualization tools for interactive reporting.
Business Impact:
-
Executives gain independence in accessing financial data.
-
Real-time insights without reliance on BI analysts.
-
Streamlined reporting across departments and report types.
-
Forecasting and scenario modeling made simple, accurate and quick.
Use Cases in Action
Producing Monthly YTD Monetisation Reports: Automating the calculations behind key metrics, seamless PowerPoint slide generation, clean, consistent reporting outputs in a standardised format.
Delivering Monetisation Insights: Automated chart creation and AI-driven callouts, generative commentary highlighting anomalies or areas needing attention, a natural language interface to query insights and commentary directly.
Tangible Benefits
-
~60% ROI: Analysts reallocated to higher-value activities, reducing attrition costs.
-
~99% efficiency gains: Manual reporting reduced to near-zero.
-
2 weeks → 10 minutes: End-to-end report creation compressed dramatically.
-
Improved data quality: Automated reconciliation reduces inconsistencies and errors.
-
Scalability: Built to handle larger datasets and evolving financial needs.
Beyond Media: Industry Relevance
The use case resonates strongly across industries, such as airlines, where BI Analysts and Finance teams spend significant time manually preparing and reconciling data. In one example, reliance on IBM Planning Analytics was slowing executive decision-making as stakeholders had to wait for analysts to deliver real-time data insights.
Watsonx Orchestrate bridges this gap by delivering:
Automation of complex financial workflows.
Generative insights at scale.
Democratisation of access to financial intelligence.
Curious how Agentic AI could reshape your finance operations? Let’s start a conversation tailored to your requirements.
The 8 Forces Reshaping the Future of Finance – and How Agentic AI Helps CFOs Lead
Gartner has pin pointed 8 disruptive forces set to fundamentally transform the finance function. These changes—spanning technological advancements, organisational shifts, and regulatory upheavals- pose both risks and opportunities for CFOs. Success will belong to those who leverage Agentic AI, such as WatsonX Orchestrate, and Extended Planning & Analytics, like IBM Planning Analytics, to not merely adapt but to lead the transformation. Finance is standing at a critical juncture. Gartner emphasises that the role of finance is evolving from historical reporting to actively shaping the future of the business.

To lead in this new landscape, CFOs require more than automation. They need Agentic AI, like IBM Watsonx Orchestrate, to operate seamlessly across workflows and Extended Planning & Analysis (xP&A), such as IBM Planning Analytics, to serve as a unified, intelligent source for forecasting, scenario planning, and decision-making.
Together, these platforms form a new operational foundation for finance, striking a balance between cost efficiency, agility, governance, and innovation.
1. A Workforce of AI Agents
The Challenge: By 2027, one-third of enterprise software will embed Agentic AI. Finance tasks once performed manually will be supervised and executed by autonomous agents, driving exponential efficiency.
The Solution:
-
Watsonx Orchestrate deploys AI agents that autonomously reconcile data, build “what-if” scenarios, or flag exceptions across ERP, CRM, and finance platforms.
-
These agents don’t just predict outcomes; they act — re-routing approvals, generating reports, and escalating high-value tasks.
2. Machine-Dominated Decision Making
The Challenge: By 2028, 70% of finance functions will rely on AI-powered real-time decisioning. Human-led bottlenecks will give way to AI-enhanced scenario modelling and automated choices.
The Solution:
-
Planning Analytics creates driver-based models that focus on variables that truly move the business (e.g., unit margins, demand drivers, or tariff costs).
-
Watsonx Orchestrate translates these models into actions, running multiple scenarios in parallel and surfacing recommendations with governance and audit trails.
The Outcome: CFOs can make confident decisions faster — automating routine trade-offs while freeing analysts to stress-test strategy.
3. Rise of Do-It-Yourself Tech
The Challenge: Low-code and no-code platforms will see $41B in spend by 2028, enabling finance to become digitally self-sufficient.
The Solution:
-
Planning Analytics provides a governed sandbox for FP&A teams to run ad-hoc models, ensuring agility without fragmenting data integrity.
-
Watsonx Orchestrate acts as the connective tissue, pulling insights into workflows and presenting results conversationally.
The Outcome: True finance self-sufficiency — teams empowered to experiment and run scenarios, without losing enterprise-wide consistency.
4. The End of Transactional Customisation
The Challenge: By 2030, most finance functions will converge on identical transactional processes. Differentiation will come from insights and agility, not customisation.
The Solution:
-
Watsonx Orchestrate automates repetitive, non-differentiating processes (invoice matching, close cycles, reconciliations).
-
Planning Analytics ensures finance value lies in insight and foresight, not transactions — embedding real-time planning across the enterprise.
The Outcome: Finance becomes a growth engine, not a cost centre, investing resources in innovation and transformation rather than maintenance.
5. The Lonely Enterprise
The Challenge: Self-service tech adoption (20–50% penetration in 2 years) will push analysis out of finance and into the business.
The Solution:
-
Planning Analytics creates a living model of assumptions, policies, and KPIs.
-
Watsonx Orchestrate enables agents to auto-generate compliance reports, simulate regulatory impacts, and escalate issues proactively.
The Outcome: CFOs can stay ahead of regulators, ensuring confidence in disclosures and agility in response, without ballooning compliance costs.
6. Maximally Matrixed Organisations
The Challenge: By 2030, large enterprises will become increasingly matrixed — characterised by complex reporting lines, distributed decision-making, and cross-functional dependencies. While this model allows global scale, it comes at a cost: decision-making slows down, bottlenecks multiply, and finance often becomes the bottleneck rather than the enabler. Gartner predicts a significant reduction in corporate decision speed due to this complexity.
How CFOs Stay Agile with IBM
-
Watsonx Orchestrate cuts across silos by deploying AI agents that integrate data from disparate systems (ERP, CRM, HR, supply chain). These agents autonomously synthesise inputs, flag bottlenecks, and propose actions without waiting for endless email chains or manual escalations.
-
Planning Analytics provides a single source of truth across geographies and business units, enabling finance teams to run real-time, driver-based scenarios that reflect the complexities of a matrixed structure.
The Outcome: CFOs regain speed and agility. Instead of being trapped in the complexity of governance and approvals, decisions are powered by cross-system insights, actionable in minutes rather than weeks. Finance evolves into the “accelerator” in a maximally matrixed enterprise.
7. The Finance Talent Crash
The Challenge: The finance profession is heading toward a talent crunch. Demand for digital, analytical, and AI skills is skyrocketing, but the supply of finance professionals with this hybrid capability is scarce. Meanwhile, much of finance talent remains locked in repetitive tasks like reconciliations, reporting, and compliance — jobs that do little to attract or retain the next generation.
How IBM & Octane Mitigate the Crash
-
Agentic AI (Watsonx Orchestrate) automates routine, manual workflows such as reconciliations, reporting prep, and document processing. By doing so, it frees scarce talent to focus on strategic work: forecasting, scenario planning, and advising the business.
-
Planning Analytics amplifies finance professionals’ value by equipping them with tools to run advanced models, predictive forecasts, and multi-scenario analysis.
-
Octane’s AI Adoption Workshops (delivered in partnership with IBM) provide hands-on reskilling for FP&A teams. These workshops ensure finance professionals transition from “spreadsheet operators” to strategic analysts who understand both the business and the AI tools that power it.
The Outcome: CFOs can do more with less. Talent is not just retained but re-energised, focused on high-value activities that align with business growth. The talent gap becomes an opportunity: finance professionals become champions of digital transformation rather than casualties of automation.
8. The Era of Discontinuous Regulatory Change
The Challenge: Regulatory landscapes are evolving faster than ever. From ESG disclosures to cross-border tax regimes and industry-specific compliance requirements, CFOs face a constant barrage of discontinuous, unpredictable regulatory changes. Manual compliance frameworks can no longer keep pace, exposing firms to risk and spiralling costs of control.
How Watsonx Orchestrate & Planning Analytics Support
-
Watsonx Orchestrate embeds governance and compliance into every workflow. AI agents automatically generate audit trails, monitor transactions for anomalies, and escalate risks before they become issues. Instead of building compliance after the fact, governance becomes native and continuous.
-
Planning Analytics enables finance to run regulatory impact scenarios in real time — modeling, for example, how a new ESG disclosure requirement might affect capital allocation or how new tax rules impact profitability by geography.
-
Combined, they give CFOs the ability to adapt instantly, ensuring compliance while keeping costs under control.
The Outcome: Regulatory change becomes less of a disruption and more of a strategic advantage. CFOs can demonstrate resilience to boards and regulators, protecting reputation while ensuring agility.
Adaptive Scenario Planning: Why This Matters Now
The real battleground for CFOs is scenario planning. Traditional methods are too slow for today’s volatility. Adaptive approaches — powered by AI — allow finance leaders to:
-
Run rolling forecasts updated daily, not quarterly.
-
Build driver-based models that respond instantly to tariffs, FX rates, or demand shocks.
-
Generate multiple scenarios in real time and attach clear contingency playbooks.
-
Show investors not just one “answer,” but a strategic range of preparedness.
Here’s where the synergy between Planning Analytics and Watsonx Orchestrate is critical:
-
Planning Analytics ensures the data model, drivers, and assumptions are clean, integrated, and ready for real-time updates.
-
Watsonx Orchestrate enables CFOs to simply ask, “How does a 5% tariff change impact margin by region?” and instantly receive scenario outputs — plus trigger next steps (e.g., adjust budgets, reschedule supplier contracts).
The CFO’s Leadership Imperative
The forces reshaping finance — from matrixed complexity to talent shortages to regulatory turbulence — are daunting. But they also present a unique opportunity. CFOs who embrace Agentic AI today won’t just adapt to disruption; they’ll lead it.
With IBM Watsonx Orchestrate (Agentic AI) and IBM Planning Analytics (xP&A), the Office of Finance can:
-
Automate: Cut month-end close cycles by 3× while reducing manual errors.
-
Anticipate: Run real-time “what-if” scenarios with confidence, powered by driver-based models.
-
Adapt: Stay compliant amid discontinuous regulatory change with embedded audit trails and anomaly detection.
-
Amplify: Re-deploy scarce finance talent into strategic, growth-focused roles.
The message is clear: The 8 forces will reshape finance — but with Agentic AI, CFOs can lead the disruption, not be disrupted.
The Payoff: Efficiency Meets Innovation
When finance leaders integrate these technologies, the results are dramatic:
-
99% faster reporting – weeks of manual effort compressed into minutes.
-
3× faster close cycles – freeing capacity for forward-looking analysis.
-
60% ROI in Year One – cost savings plus strategic impact.
-
Cultural transformation – finance staff moving from routine tasks to high-value thinking: experimentation, scenario testing, and strategic advising.
Why Partner with Octane
Transformation isn’t just about technology; it’s about execution. That’s where Octane makes the difference, you’ll hear how leaders from IBM, Rinnai Australia, and Octane are already using AI to unlock efficiency, cut manual reporting by 40+ hours a week, and even accelerate M&A integration. Watch the recording:
- AI Adoption Workshops: Delivered in partnership with IBM, Octane’s workshops provide hands-on reskilling for FP&A teams. These ensure finance professionals transition from “spreadsheet operators” to strategic analysts who understand both the business and the AI tools that power it.
- Fixed-Price Upgrade Offer: Octane can modernise your xP&A platform on a fixed-price basis after just a 2-hour technical workshop with your team.
- AI in Finance Use Cases: In parallel, after a 2-hour strategic workshop with your finance leadership, Octane will deliver two AI use cases tailored to your business — so you see tangible value in weeks, not months.
CFOs are no longer just guardians of cost, they are champions of transformation.
With Watsonx Orchestrate and Planning Analytics, powered by Octane’s delivery expertise, you can accelerate value in 6–8 weeks: modernise your platform, reskill your teams, and embed AI use cases that pay back immediately.
Bring your own Use Case
Bring to life your own use case that generates business value to your organisation with the help of our team of AI experts.
Talk to us!
IBM Planning Analytics has introduced new features that make development and administration tasks much easier. Two of the most impactful improvements are the ability to see variable values while debugging TI processes and the enhanced Database Explorer.
1. Hover to See Variable Values in TurboIntegrator Debugger
Debugging TI processes used to mean adding log statements and rerunning processes just to see variable values. With the new hover help, simply move your mouse over a variable in the debugger, and its value is displayed (e.g., sCube = 'Asset_Input').
✅ Benefit: Makes debugging much faster, eliminates extra logging, and helps you quickly confirm whether variables are behaving as expected.
Figure 1: Hovering over a variable shows its value instantly in the TI debugger

2. Database Explorer: A Smarter Way to Navigate Your Environment
Managing a Planning Analytics server or instance often involves checking how many objects exist—be it cubes, dimensions, processes, chores, or control objects. Previously, administrators and developers had to dig through folders or rely on TI scripts to gather this information. Now, with the Database Explorer, everything is accessible in one clean interface.
Key features include:
- Quick Object Counts: Instantly see how many cubes, dimensions, processes, and chores are available.
- Process Data Source Types: Displays what data source a process is using (e.g., Cube, ODBC, or 'No data source').
- Organised View: Objects are grouped into categories, reducing clutter and making navigation straightforward.
- Centralised Actions: Access logs, import/export, manage users, refresh security, or check server version from one place.
✅ Benefit: The Database Explorer improves transparency and efficiency, helping both administrators and developers work faster by providing a unified view of objects and their data sources.
Figure 2: Navigation through the Database Explorer menu

Figure 3: Object counts displayed in Database Explorer

Figure 4: Shows Data source when clicked on Processes

Small Changes, Big Impact
These updates may seem minor, but they greatly improve user productivity. From instantly checking variable values in debugging to exploring databases more efficiently, IBM Planning Analytics is now smarter and more user-friendly.
In an age where AI is often synonymous with machine learning, one of the most powerful, but often overlooked, tools in the AI toolbox is optimisation. At the heart of many real-world, high-stakes decisions lies a mathematical engine built to deliver the best possible outcome. And IBM ILOG CPLEX continues to be that engine of choice.
As we move deeper into 2025, one hot trend is hybrid AI, the combination of predictive models with prescriptive optimisation. Why predict what might happen if you can also decide what should happen? That’s where CPLEX shines.
Real-world impact: From supply chains to smart grids
Whether it’s dynamically routing fleets, allocating resources under uncertainty, or scheduling energy consumption during peak hours, organisations are leveraging CPLEX not just as a solver, but as a strategic decision engine.
Here are a few standout use cases:
-
Retail & E-Commerce: Predicting customer demand using ML, then using CPLEX to optimise fulfilment across a decentralised warehouse network.
-
Utilities: Combining real-time sensor data with CPLEX-based scheduling to balance load in smart grid systems.
-
Finance: Creating portfolio allocations that meet regulatory requirements and maximise return, all while adapting to market volatility.
Cloud-native optimisation: Scaling with IBM Cloud Pak for Data
Another major shift? Optimisation in the cloud. IBM's Cloud Pak for Data is helping companies operationalise CPLEX models in ways that were unimaginable just a few years ago. Think seamless integration with data lakes, real-time dashboards, and API-first deployment models.
Why It Matters
As business environments grow more complex, the ability to make data-driven, optimal decisions in real-time becomes a true competitive advantage. CPLEX brings mathematical certainty to uncertain times, and when combined with machine learning, it offers a full-spectrum AI approach that’s both predictive and prescriptive.
Are you exploring optimization as part of your AI strategy? Let’s connect, happy to exchange thoughts on where prescriptive analytics is heading next.
💬Talk to us: media@octanesolutions.com.au
What is ASCIIOutputOpen
In IBM Planning Analytics (TM1), TurboIntegrator (TI) processes are essential for automating data operations. One of the most useful functions in TI scripting is ASCIIOutputOpen, which allows you to open a file for writing ASCII data. Whether you need to create a new file or append data to an existing one, this function provides the flexibility to control file access and modifications efficiently.
Key Features of ASCIIOutputOpen
-
Append or Overwrite: Choose whether to overwrite an existing file or add new data to the end.
-
Shared Read Access: Enable other processes or users to read the file while it’s being written.
-
Supports Multiple File Types: Works seamlessly with .csv and .txt files, making it ideal for various data export needs.
Syntax Breakdown
The basic syntax for ASCIIOutputOpen is:
ASCIIOutputOpen(FileName, OpeningMode);
Parameters Explained
-
FileName
-
The full path and filename (including extension) where data will be written.
-
Example: "C:\Data\Report.csv"
-
-
OpeningMode
-
A numeric code that determines how the file is accessed.
-
|
Mode |
Description |
Behaviour |
|
0 |
Overwrite without shared read access |
Creates or overwrites the file; no other process can read simultaneously. |
|
1 |
Append mode without shared read access |
Adds data to the end of the existing file; no sharing. |
|
2 |
Overwrite, shared read access enabled |
Overwrites if the file exists; allows other processes to read concurrently. |
|
3 |
Append, shared read access enabled |
Adds data to the end; allows other processes to read the file simultaneously. |
Related Functions
For more granular control, you can also use:
-
FILE_OPEN_APPEND() – Opens a file in append mode.
-
FILE_OPEN_SHARED() – Opens a file with shared read access.
Combining these functions can provide finer control over file operations.
Practical Examples
Example 1: Overwriting a File with Shared Read Access
If you want to generate a new CSV report (overwriting any existing version) while allowing others to read it:
ASCIIOutputOpen("C:\\Reports\\SalesData.csv", 2);
Example 2: Appending Data with Shared Access
If you need to add new records to an existing file without locking it:
ASCIIOutputOpen("C:\\Reports\\SalesData.csv", 3);
Conclusion
ASCIIOutputOpen is a powerful function in TurboIntegrator that helps manage file exports efficiently. By understanding its different modes, you can ensure seamless data operations—whether you're generating reports, logging data, or integrating with external systems.
Pro Tip: Always verify file paths and permissions before running TI processes to avoid errors!
Have you used ASCIIOutputOpen in your projects? Share your experiences in the comments! 🚀
Looking for ways to monitor the health and status of your IBM Planning Analytics (PA) Application and Server?
Here are some methods for automating monitoring and receiving alerts whenever issues arise in the backend of your PA applications.
Before enabling these alerts, it's important to understand the key areas to monitor. Monitoring these aspects ensures your PA applications remain healthy, stable, and optimised for performance.
NOTE: Your Access role should be Administrator to view and perform all the below.
1. Database Health Monitoring
To assess the health of your PA applications and databases, follow these steps:
1. Log in to IBM Planning Analytics Workspace.
2. Navigate to Administration and click Databases.
3. Under Databases, select the desired PA application.
4. On the right-hand side of the page, click on Details to view the status and health metrics.
This provides a quick overview of the database’s performance and any potential issues that may require attention.
Sample Screenshot:

You will see various status icons that indicate the current health of the PA application. Here's what each icon represents:
![]() Indicates that the PA application is healthy and running without any issues.
Indicates that the PA application is healthy and running without any issues.
![]() Indicates that the PA application is at risk of moving into a critical state. Proactive attention may be required.
Indicates that the PA application is at risk of moving into a critical state. Proactive attention may be required.
 Indicates that the PA application is in a critical state and may potentially
lead to a system failure or downtime if not addressed immediately.
To set up automatic alerts for your PA application:
1. On the right-hand side of the application's detail page, click on Alerts.
2. From there, you can configure the threshold values that will trigger alerts based on system performance or issues.
3. To enable the Alerts, click on the respective ![]() button, which changes to
button, which changes to ![]() indicate it's enabled.
indicate it's enabled.
This allows proactive monitoring by notifying you when predefined conditions are met.
Sample Screenshot:

5. We can define the Warning threshold and Critical threshold values based on the size and memory utilised by the PA application under stable conditions.
6. Apart from that, we have options to define Critical Threshold values for factors such as –
-
Max thread wait time: we can set the Critical Threshold for maximum thread wait time for the respective PA Application to make sure the PA instance is not slowing down as we can kill thread as soon as possible.
-
Thread in run state: we can set the Critical Threshold to make sure the threads are not in Run state for more than expected in the respective PA Application, which has the possibility of slowing down the server.
-
Database unresponsive: we can set the Critical Threshold to note if Database/PA application is not responsive which helps us to action it as soon as possible.
6. We can enable the Database Shutdown Alert to enable notifications on the PA Application Stop/Downtime and Start/Restart activity.
7. We can add multiple email IDs to receive the notifications of the enabled Alerts, separated by a comma (‘, ’) in the Notify email IDs text box.
8. Click Apply to save the change made to the Alerts.
2. Agent/PA Server Health Monitoring
To assess the health of your PA Server/Agent, follow these steps;
1. Log in to IBM Planning Analytics Workspace.
2. Navigate to Administration and click Databases.
3. Under Agents, select the desired Agent.
4. On the right-hand side of the page, click on Details to view the status and health metrics.
This provides a quick overview of the database’s performance and any potential issues that may require attention.
Sample screenshot:

To set up automatic alerts for your PA Server:
1. On the right-hand side of the application's detail page, click on Alerts.
2. From there, you can configure the threshold values that will trigger alerts based on system performance or issues.
3. To enable the Alerts, click on the respective ![]() button, which changes to
button, which changes to ![]() indicates it's enabled.
indicates it's enabled.
Sample Screenshot:

4. We can define the Warning threshold and Critical threshold values based on the size and memory utilized by the PA application on stable conditions.
5. We can add multiple emails IDs to receive the notifications of the enabled Alerts separated by a comma (‘ , ’) in the Notify email IDs text box.
6. Click Apply to save the change made to the Alerts.
The need for agile financial planning
In today’s rapidly evolving business landscape, organisations face unprecedented volatility, supply chain disruptions, fluctuating demand, inflationary pressures, and geopolitical uncertainties. Traditional financial planning methods, reliant on static spreadsheets and manual processes, are no longer sufficient. Businesses need real-time insights, predictive foresight, and the ability to pivot quickly in response to changing conditions.
Enter IBM Planning Analytics with Watson’s AI Assistant, a cutting-edge solution that combines multidimensional modelling with conversational AI. This solution is transforming how enterprises approach budgeting, forecasting, and performance management. This isn’t just an incremental improvement; it’s a paradigm shift in financial planning and analysis (FP&A).
.png?width=488&height=281&name=Future%20of%20finance%20(1).png)
What is IBM Planning Analytics with AI Assistant?
IBM Planning Analytics, built on the powerful TM1 engine, has long been recognised for its:
-
In-memory computing for lightning-fast calculations
-
Multidimensional modelling for complex scenario analysis
-
Seamless Excel integration for user-friendly analytics
Now, with the AI Assistant, the platform goes beyond traditional analytics by embedding Watson-powered artificial intelligence directly into the planning workflow. This AI-driven co-pilot enables users to interact with their data conversationally, uncovering insights that would otherwise require deep technical expertise.
How does the AI assistant work?
Think of it as a data-savvy colleague who can:
-
Answer complex financial questions in natural language (e.g., *“Why did Q2 profitability decline in the Asia-Pacific region?” *)
-
Automatically detect anomalies and suggest corrective actions
-
Generate predictive forecasts based on historical trends and external factors
-
Run instant what-if scenarios (e.g., “What happens if raw material costs increase by 15%?”)
Unlike traditional BI tools that require users to write queries or build complex models, the AI Assistant democratizes analytics, making advanced insights accessible to finance teams, business leaders, and operational managers alike.
Key Benefits of IBM Planning Analytics with AI Assistant
Natural language queries – No coding required
Gone are the days of struggling with MDX or complex formulas. Users can simply ask questions in plain English, such as:
-
“Show me sales performance by region last quarter.”
-
“Why are operating expenses higher than forecast?”
-
“Predict next quarter’s revenue based on current trends.”
The AI Assistant interprets intent, retrieves relevant data, and presents answers in interactive dashboards, charts, or drill-down reports, eliminating the need for IT intervention.
Real-time cognitive insights
The AI Assistant continuously monitors data patterns, flagging anomalies and suggesting corrective actions before they escalate into bigger issues. For example:
-
“Inventory turnover in the Northeast is 20% below target, recommend adjusting procurement orders.”
-
“Marketing spend is exceeding budget due to higher-than-expected digital ad costs.”
This proactive intelligence helps businesses stay ahead of risks and opportunities.
Instant scenario modelling & what-if analysis
Strategic planning no longer takes weeks. With AI-powered scenario modelling, finance teams can:
-
Test multiple business conditions in seconds (e.g., “What if interest rates rise by 2%?”)
-
Compare outcomes side-by-side
-
Adjust assumptions dynamically
This capability is invaluable for risk management, capital allocation, and growth planning
Democratised analytics for cross-functional teams
The AI Assistant breaks down data silos, allowing:
-
Finance teams to explore profitability drivers
-
Sales leaders to assess pipeline impacts
-
Supply chain managers need to optimise inventory levels
By making analytics self-service, organisations reduce dependency on IT and accelerate decision-making.
Explainable AI: Not just predictions, but reasons
Many AI tools provide forecasts but fail to explain why a trend is occurring. IBM’s AI Assistant goes further by:
-
Highlighting key drivers behind variances (e.g., “Q3 revenue dipped due to delayed product launches in Europe.”)
-
Suggesting actionable recommendations (e.g., “Consider reallocating budget to high-growth markets.”)
This transparency builds trust in AI-driven insights.
Real-world use case: Transforming a CFO’s workflow
Imagine a CFO who starts their day with an AI-generated briefing:
“Good morning. Last week, operating margins in the retail division fell by 8% due to higher logistics costs. Supplier X increased rates by 12%. Recommended actions: Renegotiate contracts or explore alternative vendors. Additionally, Q4 demand forecasts suggest a 15% increase, consider ramping up production.”
This level of automated, intelligent guidance enables faster, more informed decisions, reducing planning cycles from weeks to hours.
Seamless Integration with Existing Tools
IBM Planning Analytics doesn’t operate in isolation. It integrates with:
-
Microsoft Excel (for familiar spreadsheet-based planning)
-
Power BI & Tableau (for advanced visualisations)
-
ERP systems (SAP, Oracle, NetSuite) for real-time data synchronisation
The AI Assistant acts as a universal translator, bridging gaps between disparate systems and delivering unified insights.
The future of work: Augmented, not automated
A common fear is that AI will replace human jobs. However, IBM Planning Analytics is designed to augment—not replace, FP&A teams.
-
AI handles data processing, anomaly detection, and predictive modelling.
-
Humans focus on strategy, stakeholder collaboration, and creative problem-solving.
The result? Higher productivity, deeper insights, and more strategic impact.
Is your organisation ready for AI-driven planning?
Adopting IBM Planning Analytics with AI Assistant requires:
-
A shift from manual to automated processes
-
Trust in data-driven decision-making
-
Willingness to experiment with AI-powered insights
For companies that embrace this transformation, the rewards are substantial:
-
Faster, more accurate forecasts
-
Proactive risk mitigation
-
Empowered teams with self-service analytics
Start your AI-powered planning journey
The best way to experience the power of IBM Planning Analytics with AI Assistant is to run a pilot project. Begin with a single department, finance, sales, or operations and measure the impact.
Your planning process will never be the same.
📅 Ready to explore how AI can revolutionise your financial planning? Contact us for a demo and learn more.
The past few weeks have been a whirlwind, a high stakes balancing act that tested the limits of our team's resilience and expertise. We simultaneously managed two major client migrations. Both were for high profile large clients and part of their IBM Planning Analytics Modernisation initiative:
.png?width=435&height=249&name=TM1%20newsletter%20(8).png)
The clients
News Corp - News Corp Australia tells the stories that matter to 18.2 million Australians every month as an important part of News Corp, a diversified global media and information services company. From breaking news in the morning to deciding dinner that night, Australia trusts our brands to inform, inspire and delight across the day – including The Australian, The Daily Telegraph, Herald Sun, The Courier-Mail, The Advertiser, Mercury, NT News, Townsville Bulletin, The Cairns Post, Gold Coast Bulletin, Geelong Advertiser, news.com.au, Vogue, GQ, Kidspot, taste.com.au and plenty more. More here https://www.newscorpaustralia.com/
A long-time TM1 user was looking at refreshing its application and modernise it by going to the cloud and utilising new dashboarding capabilities of the workspace and starting some testing on AI capabilities for the Finance team. TM1 is one of the core applications within the Finance team and they could not afford to run the risk of a prolonged upgrade to the cloud.
BlueScope They are a global leader in metal coating and painting products for the building and construction industries, providing vital components for houses, buildings, structures, vehicles, and more.
They have built a solid foundation for growth with a diverse portfolio of businesses in some of the largest and fastest-growing economies of the world. They are headquartered in Australia, with our people and operations spread across North America, Australia, New Zealand, the Pacific Islands, and throughout Asia. More here https://www.bluescope.com/
BlueScope is also a long-term TM1 user with the application used for a number of areas including demand planning, forecasting and Reporting in the Finance teams. They were on an older version of on–prem TM1 and upgrading to the latest version of on-prem IBM Planning Analytics TM1
A Perfect Storm
Both projects presented unique challenges. NEWS's migration required significant user training and change management, while BlueScope's upgrade involved complex technical configurations and intricate coordination with multiple stakeholders. To make matters even more challenging, both go-lives were scheduled for the same day!
Overcoming the Odds
How did we navigate this perfect storm?
- Strong Leadership: Clear and decisive leadership was crucial in keeping the projects on track. By setting clear expectations, prioritising tasks, and making timely decisions, we were able to mitigate risks and ensure smooth execution.
- Effective Teamwork: Our team demonstrated exceptional teamwork and collaboration. By working closely together, we could share knowledge, support each other, and address challenges proactively.
- Agile Methodology: We adopted an agile approach, breaking down the projects into smaller, manageable phases. This allowed us to adapt to changing circumstances and deliver value incrementally. We have built up a comprehensive checklist for our upgrade TM1 upgrades and this makes upgrades easier and risk free.
- Robust Communication: Open and transparent communication was key to keeping all stakeholders informed and aligned. Regular status updates, clear documentation, and effective problem-solving ensured a smooth transition.
Lessons Learned
These experiences have taught us valuable lessons:
- Prioritise and Plan: Careful planning and prioritization are essential, especially when managing multiple projects simultaneously.
- Embrace Flexibility: Be prepared to adapt to unexpected challenges and changes in scope.
- Build Strong Relationships: Strong relationships with clients and team members are crucial for successful project delivery.
- Learn from Mistakes: Analyse past projects to identify areas for improvement and avoid repeating errors.
Successful outcomes for both clients
The upgrade was successful for both clients and went live on the same day. This was a testament to my team’s technical ability and tenacity to ensure we followed our upgrade checklist. All testing and end-user training went well. One of our key tenets of upgrades is to ensure that client communication around changed functionality and look and feel is explained, trained and tested. The stakeholders from our client side were great and the whole team went above and beyond during the upgrade and deployment.
Both the upgrade took under 6 weeks to complete with minimal disruption to the business.
A huge shoutout goes to Alpheus and Rajan for their stellar work on the NEWS migration, ensuring a smooth transition to the Cloud, and to Baburao for expertly managing the BlueScope upgrade, and overcoming every hurdle that came our way.
Your Turn
Have you faced similar challenges in managing multiple simultaneous projects? How did you overcome them? Share your experiences and insights in the comments below.
If you are looking to modernise or upgrade your IBM Planning Analytics, then contact us and we would be happy to guide you.
Planning Analytics Workspace (PAW) offers a robust suite of visualizations, enabling users to create rich and compelling reports and dashboards with remarkable flexibility. However, even with these capabilities, you may occasionally encounter requirements that push the limits of what PAW provides out of the box.
One such scenario I encountered was the need to create a column chart comparing Actual vs Budget variance. The twist? Any negative variance should be highlighted with a red bar, while positive variance should be displayed in green, as shown below:

PAW’s default settings don't currently offer this kind of custom conditional formatting for visualizations. However, with a little MDX magic and a few formatting tweaks, you can achieve this effect in just five simple steps.
Step-by-Step Guide to Creating Custom Visualizations in PAW
Step 1: Position the Version Dimension in the Column
Start by positioning the Version dimension in the column of the Exploration view. This is where we will apply the MDX logic to derive the desired results.
Step 2: Use MDX to Create Calculated Members
Next, you'll need to update the MDX query by creating three calculated members to represent Actual vs Budget (AvB), Positive Variance, and Negative Variance.
Here’s the MDX code:
MDX code:
WITH
MEMBER [Version].[Version].[AvB] AS [Version].[Version].[Actual] - [Version].[Version].[Budget]
MEMBER [Version].[Version].[Positive] AS IIF([Version].[Version].[AvB] > 0, [Version].[Version].[AvB], "")
MEMBER [Version].[Version].[Negative] AS IIF([Version].[Version].[AvB] < 0, [Version].[Version].[AvB], "")
Note: The AvB calculation could also be done using a consolidated member in the Version dimension, where the Budget has a negative weight.
Step 3: Replace the MDX in the Row Axes
Now, replace the MDX in the Row Axes relating to the Version dimension to show only the Positive and Negative calculated members, while excluding the AvB calculation (and any other member):
MDX code:
{
EXCEPT(
{
[Version].[Version].[AvB],
[Version].[Version].[Positive],
[Version].[Version].[Negative]
},
{
[Version].[Version].[AvB]
},
ALL
)
}
This MDX will generate a view that displays only Positive and Negative members in the Version dimension, leaving the non-relevant member (whether positive or negative) as blank, depending on the AvB value.
Step 4: Convert the Exploration View into a Column Chart
Once the MDX has been applied, convert the Exploration view into a Column Chart. By default, PAW will show the columns for positive and negative values with its standard color scheme.

Step 5: Apply a Custom Color Palette
To finalize the visualization, we’ll apply a custom color palette. Navigate to the visualization properties and create a color palette that includes only two colors: green for positive values and red for negative values.

Conclusion
With just a few lines of MDX and a bit of customization, you can significantly enhance PAW visualizations. This technique allows you to move beyond the standard out-of-the-box options, giving you the flexibility to create more intuitive and visually effective reports. Whether you're comparing Actual vs Budget or any other metrics, these methods help you build visuals that not only convey the necessary information but do so in a way that is easy to interpret at a glance.
By leveraging MDX and PAW’s formatting tools, you can push the boundaries of your reporting and create dynamic, insightful dashboards tailored to your business needs.
In this blog post, we will showcase the process of exposing the transaction logging on Planning Analytics (PA) V12 on AWS to the users. Currently, in Planning Analytics there is no user interface (UI) option to access transaction logs directly from Planning Analytics Workspace. However, there is a workaround to expose transactions to a host server and access the logs. By following these steps, you can successfully access transaction logged in Planning Analytics V12 on AWS using REST API.

Step 1: Creating an API Key in Planning Analytics Workspace
The first step in this process is to create an API key in Planning Analytics Workspace. An API key is a unique identifier that provides access to the API and allows you to authenticate your requests.
- Navigate to the API Key Management Section: In Planning Analytics Workspace, go to the administration section where API keys are managed.
- Generate a New API Key: Click on the option to create a new API key. Provide a name and set the necessary permissions for the key.
- Save the API Key: Once the key is generated, save it securely. You will need this key for authenticating your requests in the following steps.
Step 2: Authenticating to Planning Analytics As a Service Using the API Key
Once you have the API key, the next step is to authenticate to Planning Analytics as a Service using this key. Authentication verifies your identity and allows you to interact with the Planning Analytics API.
- Prepare Your Authentication Request: Use a tool like Postman or any HTTP client to create an authentication request.
- Set the Authorization Header: Include the API key in the Authorization header of your request. The header format should be Authorization: Bearer <API Key>.
- Send the Authentication Request: Send a request to the Planning Analytics authentication endpoint to obtain an access token.
Detailed instructions for Step 1 and Step 2 can be found in the following IBM technote:
How to Connect to Planning Analytics as a Service Database using REST API with PA API Key
Step 3: Setting Up an HTTP or TCP Server to Collect Transaction Logs
In this step, you will set up a web service that can receive and inspect HTTP or TCP requests to capture transaction logs. This is crucial if you cannot directly access the AWS server or the IBM Planning Analytics logs.
- Choose a Web Service Framework: Select a framework like Flask or Django for Python, or any other suitable framework, to create your web service.
- Configure the Server: Set up the server to listen for incoming HTTP or TCP requests. Ensure it can parse and store the transaction logs.
- Test the Server Locally: Before deploying, test the server locally to ensure it is correctly configured and can handle incoming requests.
For demonstration purposes, we will use a free web service provided by Webhook.site. This service allows you to create a unique URL for receiving and inspecting HTTP requests. It is particularly useful for testing webhooks, APIs, and other HTTP request-based services.
Step 4: Subscribing to the Transaction Logs
The final step involves subscribing to the transaction logs by sending a POST request to Planning Analytics Workspace. This will direct the transaction logs to the web service you set up.
Practical Use Case for Testing IBM Planning Analytics Subscription
Below are the detailed instructions related to Step 4:
- Copy the URL Generated from Webhook.site:
- Visit siteand copy the generated URL (e.g., https://webhook.site/<your-unique-id>). The <your-unique-id> refers to the unique ID found in the "Get" section of the Request Details on the main page.

- Subscribe Using Webhook.site URL:
- Open Postman or any HTTP client.
- Create a new POST request to the subscription endpoint of Planning Analytics.
- In Postman, update your subscription to use the Webhook.site URL using the below post request:

- In the body of the request, paste the URL generated from Webhook.site:
{
"URL": "https://webhook.site/your-unique-id"
}
<tm1db> is a variable that contains the name of your TM1 database.
Note: Only the transaction log entries created at or after the point of subscription will be sent to the subscriber. To stop the transaction logs, update the POST query by replacing /Subscribe with /Unsubscribe.
By following these steps, you can successfully enable and access transaction logs in Planning Analytics V12 on AWS using REST API.
One of the standout features of Planning Analytics Workspace (PAW) is its ability to create calculations in the Exploration view. This feature empowers users to perform advanced calculations without the need for technical expertise. Whether you're using PAW or PAfE (Planning Analytics for Excel), the Exploration view offers a range of powerful capabilities. The Exploration view supports a variety of functions, such as aggregations, mathematical operations, conditional logic, and custom calculations. This means you have the flexibility to perform complex calculations tailored to your specific needs.
This enables users to create complex financial calculations and business rules within the views, providing more accurate and tailored results for analysis and planning. All this can be done by the business users themselves without relying on IT or development teams, enabling faster and more agile reporting processes. This enables creating ad hoc reports and performing self-service analysis on the fly with a few simple clicks. This self-service capability puts the control in the hands of the users, eliminating the need for lengthy communication processes or waiting for IT teams to fulfill reporting requests.
In this blog post, we will focus on an exciting aspect of the Exploration view: creating MDX-based views that are dynamic and automatically update as your data changes. The beauty of these dynamic views is that users no longer need to manually select members of dimensions to keep their formulas up to date.
Similar to the functionality of dynamic subsets in dimensions, where each click in the set editor automatically generates MDX statements that can be modified, copied, and pasted, the exploration views in Planning Analytics Workspace also generate MDX statements. These MDX statements are created behind the scenes as you interact with the cube view. Just like MDX subsets, these statements can be easily customized, allowing you to fine-tune and adapt them to your specific requirements.
By being able to tweak, copy, and paste these MDX statements, you can easily build upon previous work or share your calculations with others.
Currently, the calculations are not inherently dynamic, however, there are techniques that can be employed to make the calculations adapt to changing time periods.
A classic example we can look at is performing variance analysis on P&L cube where we wish to add a variance formula to show the variance of current month from the previous month. There are many more calculations that we can consider from but we will focus on this analysis in this blog.
If we take our example, the current month and previous month keep changing every month as we roll forward and they are not static. When dealing with changing months or any member in your calculation, it's important to ensure that your calculations remain dynamic and adaptable to those changes.
To ensure dynamic calculations that reflect changes in months, you have several options to consider:
Manual Approach: You can manually update the column dimensions with the changing months and recreate the calculations each time. However, this method is time-consuming, prone to errors, and not ideal for regular use.
Custom MDX Approach: Another option is to write custom MDX code or modify existing code to reference the months dynamically from a Control cube. While this approach offers flexibility, it can be too technical for end users.
Consolidations Approach: Create consolidations named "Current Month" and "Prior Month" and add the respective months to them as children. Then, use these consolidations in your view and calculations. This approach provides dynamic functionality, but you may need to expand the consolidations to see the specific months, which can be cumbersome.
Alias Attributes Approach: Leverage alias attributes in your MDX calculations. By assigning aliases to the members representing the current and previous months, you can dynamically reference them in your calculations. This approach combines the benefits of the previous methods, providing dynamic calculations, visibility of months, and ease of use without excessive manual adjustments.
In this blog post, we will focus on the alias attributes approach as a recommended method for achieving dynamic calculations in PAW or PAfE. We will guide you step-by-step through the process of utilizing alias attributes to ensure your calculations automatically adapt to changing months. By following this approach, you can simplify your calculations, improve efficiency, and enable non-technical users to perform dynamic variance analysis effortlessly.
To create dynamic calculations for variances between the current and prior month, you can follow these steps:
- Step 1: Ensure you have an alias attribute available in your Month dimension. If not, create a new alias attribute specifically for this purpose.
- Step 2: Update the alias with the values "Curr Month" and "Prior Month" for the respective months.
- Step 3: Open the exploration view in PAW and select the two months (current and prior) on your column or row dimension.
- Step 4: Create your variance calculation using the exploration view's calculation capabilities. This could involve subtracting the P&L figures of the prior month from the current month, for example.
- Step 5: Open the MDX code editor and replace the actual month names in the MDX code with the corresponding alias values you updated in Step 2. You can copy the code in Notepad and use the "Find and Replace" function to make this process faster and more efficient.
.gif?width=600&height=243&name=ezgif.com-video-to-gif%20(3).gif)
By replacing the month names with the alias values, you ensure that the calculation remains dynamic and adapts to the changing months without manual intervention. When you update the alias values in the Month dimension, it will reflect in the exploration view. As a result, the months displayed in the view will be dynamically updated based on the alias values. This ensures that your calculations remain synchronized with the changing months without the need for manual adjustments.

Important Note: When selecting the months in set editor, it is crucial to explicitly select and move the individual months from the Available members' pane (left pane) to the Current set pane (right pane). This step is necessary to ensure that unnecessary actions, such as expanding a quarter to select a specific month, are not recorded in the MDX code generated in the exploration view which can potentially lead to issues while replacing the member names with alias values.
This approach of using alias attributes to make calculations dynamic can be extended to various other calculations in Planning Analytics Workspace. It provides a flexible and user-friendly method to ensure that your calculations automatically adapt to changing dimensions or members.
That being said, it's important to note that there may be certain scenarios where alternative approaches, such as writing custom MDX code or utilizing a control cube, are necessary. Each situation is unique, and the chosen approach should align with the specific requirements and constraints of the calculation, however the proposed approach should still work for a wide variety of calculations in IBM Planning Analytics.
As the world moves towards more data-driven decision-making, businesses are increasingly looking for effective planning and budgeting solutions. IBM Planning Analytics is the go-to for businesses looking for a comprehensive set of tools to help them manage their budgeting and planning process.

With Planning Analytics, businesses can access powerful analytics to make more informed decisions, leverage advanced features to create complex models, and gain better insights into their financial data.
IBM is constantly improving the functionalities and features of the IBM Planning Analytics components. This includes Planning Analytics Workspace (PAW), Planning Analytics for Excel (PAfX), and Planning Analytics with Watson. With these updates, businesses can take advantage of new features to help them manage their budgeting and planning process more effectively.
In the last 12 months, IBM has released several updates to its Planning Analytics components.
In PAW, users can now access advanced analytics such as forecast simulations, predictive models, and scenario analysis. They can also perform in-depth analysis on their data with the new Visual Explorer feature. In addition, users can now access a library of planning and budgeting models, which can be customized to fit the needs of their organization. (download PDF file to get the full details)
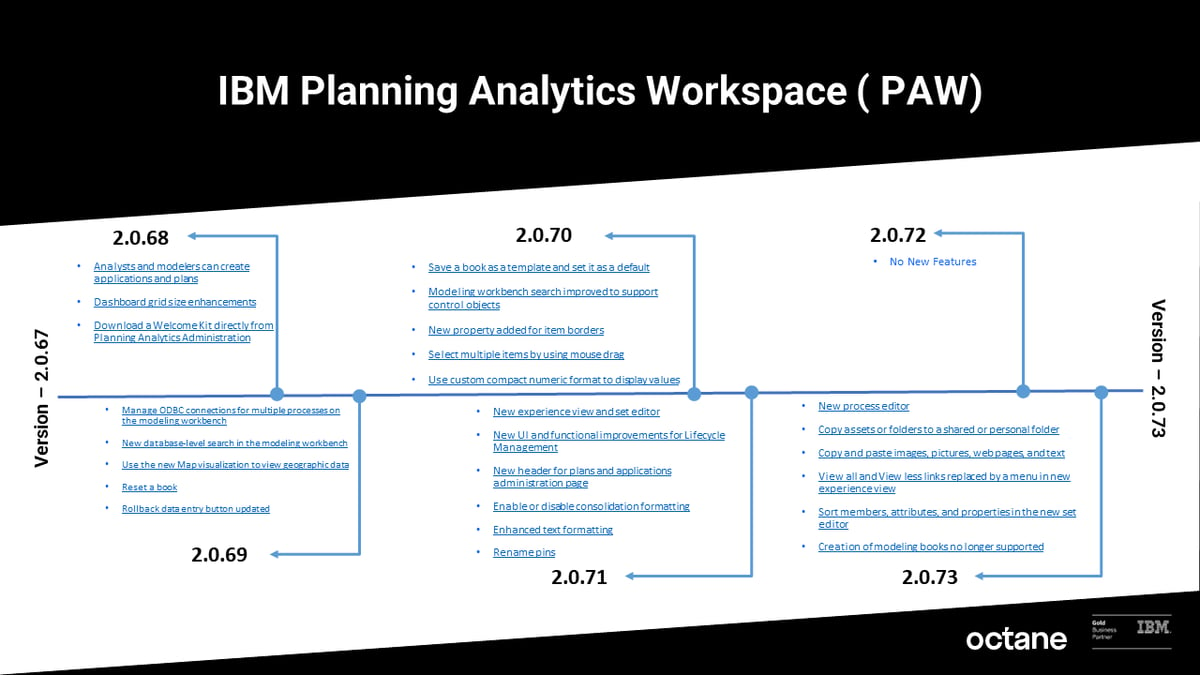 download PDF file to get the full details
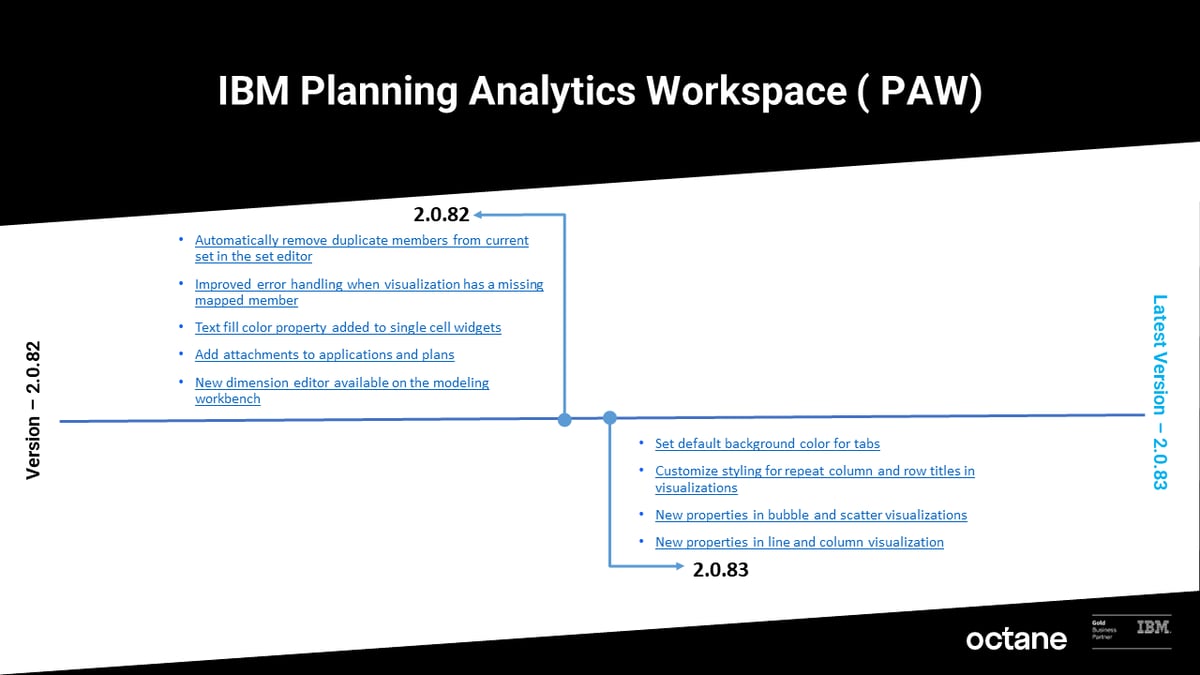 download PDF file to get the full details
In PAfX, users can now access advanced features such as SmartViews and SmartCharts. SmartViews allows users to visualize their data in various ways, while SmartCharts allows users to create interactive charts and graphs. Users can also take advantage of the new custom formatting options to make their reports look more professional.
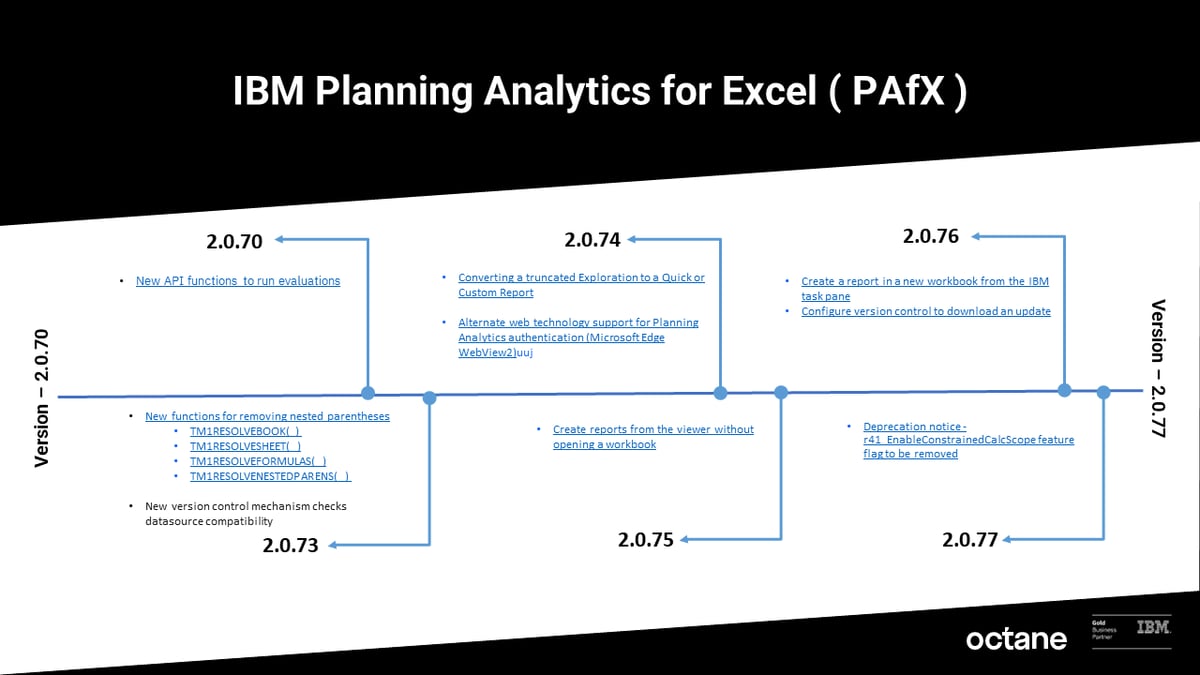 download PDF file to get the full details
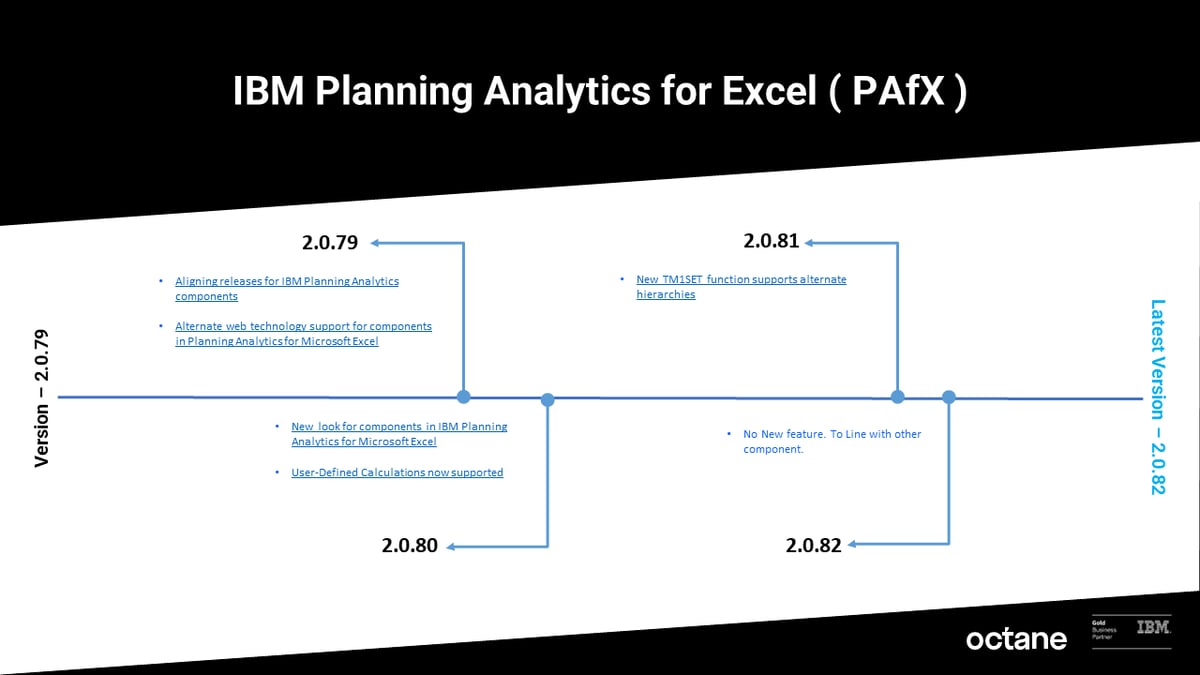 download PDF file to get the full details
Finally, with Planning Analytics with Watson, users can access powerful AI-driven insights. This includes AI-driven forecasting, which allows users to create more accurate forecasts. In addition, Watson can provide insights into the drivers of their business, allowing users to make more informed decisions.
 download PDF file to get the full details
Overall, IBM’s updates to the Planning Analytics components provide businesses with powerful tools to help them manage their budgeting and planning process. With these updates, businesses can take advantage of the latest features to quickly access data-driven insights, create more accurate forecasts, and gain better insights into their financial data.
Download the PDF file below to get the full version of each IBM Planning Analytics components.
PAW Local Distributed is an upgrade to Planning Analytics Local Workspace that can be deployed in a container orchestration engine using either Docker Swarm by Docker or Kubernetes - an open source by Google, for high availability, fail-over, scalability, and fault tolerance in multiple application servers or virtual or even cloud machines.
Architecture:
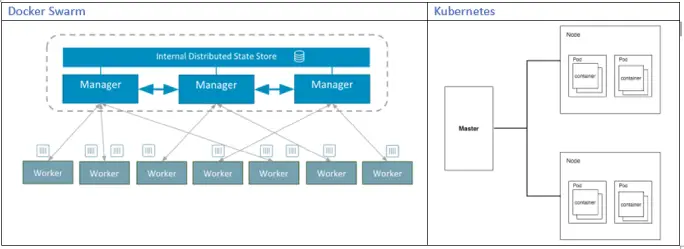
The Planning Analytics Workspace Distributed is run on a Swarm mode by deploying the application on multiple Docker nodes (with unique node ids) also known as Swarm.
Docker Engine CLI could be used to create a swarm and deploy and manage the application services in swarm.
Swarm mode ensures secured connection across multiple servers. Additionally, some of the key features that Swarm mode offers includes:
Cluster management integrated with Docker Engine,
Declarative service model,
Desired state reconciliation,
Horizontal Scaling and Load Balancing,
Multi-host networking,
Automatic service discovery,
Service Discovery,
Rolling updates with roll-back
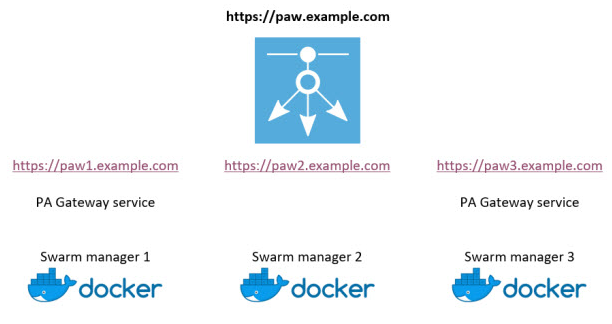
The Docker engine maintains high availability by effectively scheduling the failed node’s task to other nodes.
It was released in 2.0.41 version of Planning Analytics Workspace and is available to be downloaded from IBM Fix Centre from below link.
Note: The Docker Swarm is currently supported on Red Hat Enterprise Linux (RHEL) only.
The Docker Enterprise Edition for RHEL could be downloaded from the following link:
https://docs.docker.com/install/linux/docker-ee/rhel/
In the latest version of PAX (2.0.44) as well as PAW (2.0.44), IBM has added a new capability to allow the views to be shared between PAW and PAX using Planning Analytics Workspace Content Store.
What does this mean for us?
We can now save the views in content store and share it across to be accessed from either PAW or PAX which was not possible earlier. This further strengthens the integration and make the PAX and PAW interoperation even more seamless which a good step as far as usability and software portability is concerned.
Steps to access the views from PAW content store from PAX:
We already know how to save the views in content store within PAW – this is done by clicking the save button in the view and selecting the destination folder in content store.
To access the views saved in content store, click at View icon available on PAX toolbar that opens the folder structure of the content store.
Navigate to the folder where the view is saved then select the desired Report Type from the bottom and click Select.

Steps to save the views in PAW content store from PAX:
Note: This applies only to Exploration Views in PAX. For the other report types, they can be published to TM1 Applications folder from PAX and access in PAW. The saved exploration view when opened in PAW, opens as a normal view.
Open a view in Exploration mode and click Save View icon in PAX toolbar under Exploration tab.
You will be provided with two options to choose from:
- Save to Content Store: This saves the view in PAW Content Store
- Save to Server: This saves the view to TM1 data server.

When saving the view to Server, there is an option to save it as MDX view, however, please note that if this is checked, the view will not be accessible from Architect as Architect does not support MDX based views.
2.1 When saving the view
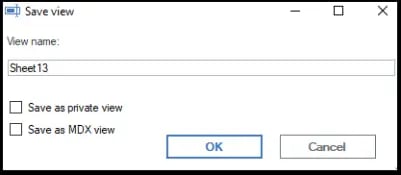
Once the view is saved in PAW Content Store, it can then be accessed from PAW and any changes made to the view and saved in either of the platforms will be reflected across.
*Tip: You may still be able to create a view in PAW and save it to TM1 Server so it can be accessed from both PAX and Architect, however be mindful that if you make any change to the view in PAW and try to override the view, that will not be possible. It will only give you an option to save the view in PAW Content Store. It is possible to update the view and save the changes in PAX that is reflected across all platforms but currently not in PAW.
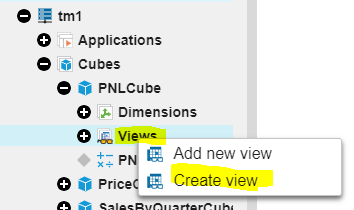
To create a view in PAW, right click the Views and select ‘Create view’. This view when saved will be saved in TM1 database directory and is visible in both PAX and Architect both.
What's interesting to note is that Planning Analytics Workspace (PAW) version 2.0.40 and 2.0.41 are combined so that the release of Planning Analytics Workspace 2.0.41 aligns with the IBM Planning Analytics for Microsoft Excel (PAX) release.
With several fixes applied to both PAW and PAX in this version; this post will focus more on the enhancements and features. However, should you want to review the fixes, you can find those here.
Features:
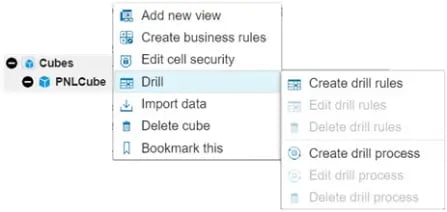
With this release, you will now be able to create and edit drill through rules and processes in Workspace.
Also finding users who don't have any permissions is quick and straightforward by using the new menu.
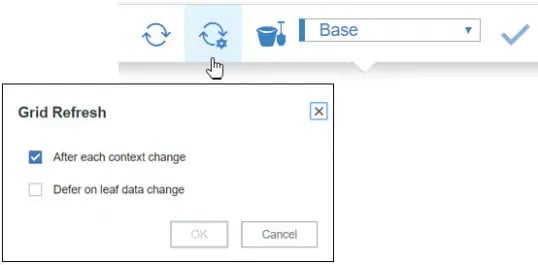
A new quality of life enhancement is that grid refreshes can be configured to automatically refresh on new views when it's n level data changes.
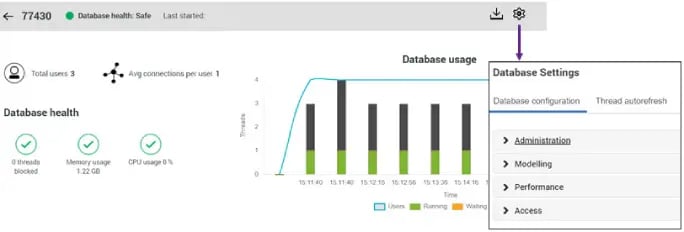
Database configuration parameters are now set from the database activity report.
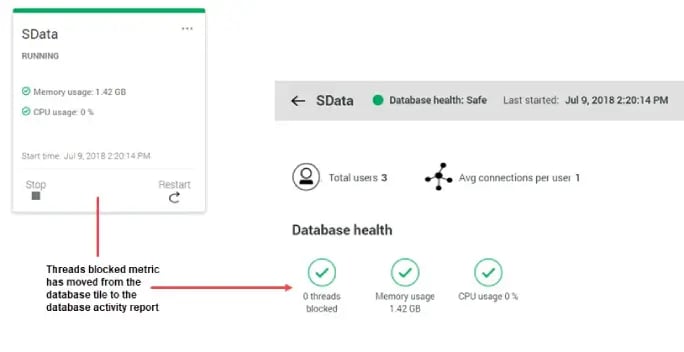
With this other metrics such as threads blocked will also now appear on the database activity report.
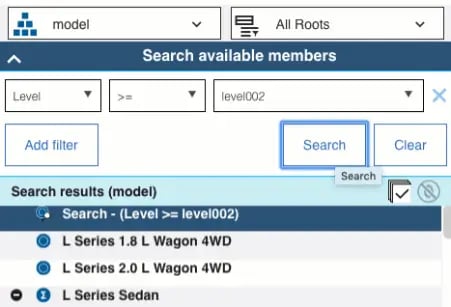
The set editor allows you to now define which levels of a hierarchy to include in a report with dynamic ranges.These can be defined as Level >= level002.
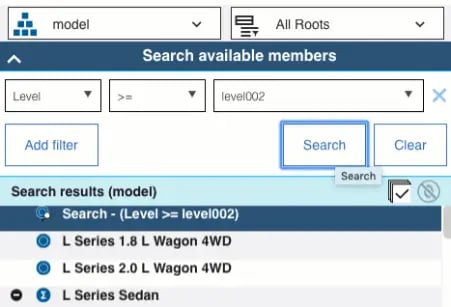
There are individual icons for dynamic and static sets helping determine whats dynamic in the hierarchy and what is not.

Planning Analytics Workspace can now be Distributed on Docker Swarm but currently supported on Red Hat Enterprise Linux only.
You can use Constrained Calculations in PAX to narrow the scope of the recalculates to just your active worksheet; Increasing the performance and speed of the worksheet.
Whilst this covers the main features; there is plenty more to read, follow this link to IBM for more.
Thank you if you have come back for more! Hope our last blog Unraveling TM1 : Lesser Known Facets – Part A was meaningful. In this part we will unearth & explore few more of these lesser known gems.
As always, if you like what we do and want to associate; subscribe to our Blogs at http://blog.octanesolutions.com.au
Function TM1RPTROW
We know TM1RPTROW is a salient function when building demand and rolling forecasts in Planning and Budgeting models
Although everyone is aware of the fact that parameters like Dimension Subset, MDX Expressions are a part of TM1RPTROW, developers tend to assume the following features are either hard to achieve or are time consuming.
TIP 4. Search Functionality on the elements of TM1RPTROW
Subset elements can be filtered by wildcard search in Subset editor; we all now this. Similar approach has been used to look for an element in websheets.
As an alternative to subsets in TM1RPTROW, let’s look into another parameter which serves the purpose - MDX
Syntax: TM1RptRow(ReportView, Dimension, Subset, SubsetElements, Alias, ExpandAbove,MDXStatement, Indentations, ConsolidationDrilling)
.webp?width=684&height=273&name=S1(1).webp)
As an illustration, consider a TM1 Websheet created to understand how it could be done.
As shown in the screenshot below, a search option has been provided with for a model from the view.
Create the MDX expression which is to be referred in a cell as illustrated below
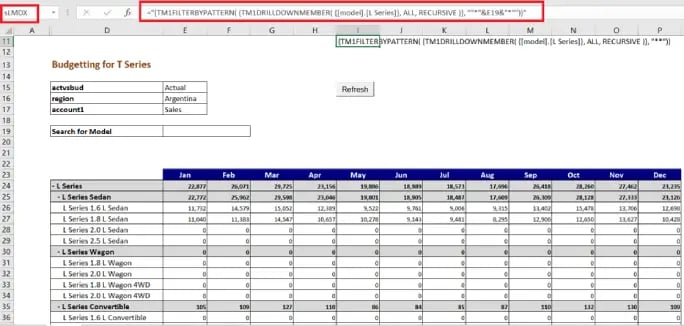
In the screen shot, MDX (Cell I11) is getting filtered based on the data provided in cell E19.
This is when the MDX parameter of TM1RPTROW must be updated to refer to the Cell I17(named as sLMDX) as shown in screenshot below.
![]()
It can be seen that MDX Parameter is updated to refer the MDX expression only if search cell has some value and not when null (in the case as TM1RPTROW functionality Subset will take precedence)
Resulting a view as per the search expression; Provide a wildcard expression (which is supported in TM1) and refresh the sheet.
View will be refreshed with data for only the searched elements as shown below. Thereby delivering the purpose.

TIP 5. Switching between two different views in TM1 Web
Though not a requisite to have to switch between 2 different views, there comes times and a business need which may require you to deliver different views.
Consider an Example of standard IBM model Salescube in Sdata Instance.
In Model Dimension of SalesCube, we have model elements S Series, L Series and T Series. User Case: ‘S Series’ and ‘T Series’ model (in this case being car models) need to be forecasted/Budgeted for future years based on the actuals of L Series.

To accomplish this, the Web screen should show ‘L Series’ as selected actuals and ‘T Series’, ‘S series’ for Forecast/Budget version.
For illustration purpose, consider the TM1 Websheet below…
As we know by now, TM1RPTROW has a parameter to provide Dimension Subset.
We will create 3 subsets which has L Series elements, T-Series & S-Series elements respectively

Definitely not as complicated as it may sound, When actual is selected:
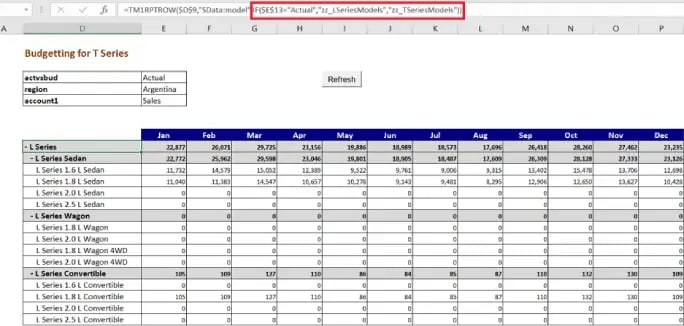
From the screenshot, it is clear that when “actvsbud” is changed from Actual to any other Version, the view of a websheet will change (as specified in TM1RPTROW) once refreshed. Developers can use Nested IF, if the requirement is to have different view sets for each selection in the dimension.
Refreshing the websheet results in (refer image below);
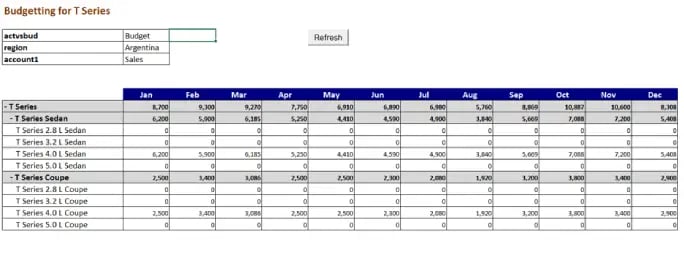
TIP 6. Locking rows to restrict user entry
Think SECURITY; there would be scenarios when users are provided with view access only into TM1 Web applications.
While security is good and essential, there would be times when the underlying cube has huge volumes of data and applying cell security may result in performance issues.
While formatting (locking the cells/row of a particular measure) in excel is an option, formatting an area in TM1 active form can be used extensively to avoid cell security.
Consider an example (refer fig below), the need is 1.6 Series to be non-editable.
Using excel ‘IsNumber’ and ‘search’ function look for 1.6 in the TM1RPTROW elements (as shown in the below screenshot). Name the row as L to setup formatting in format area of active form.
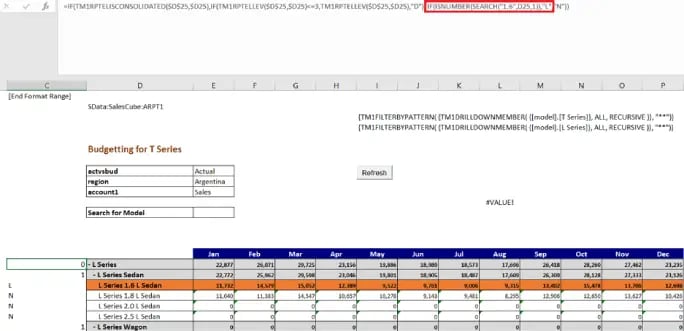
Insert a row in the format area and name the row as L as shown below.

Format colour as user’s requirement and lock the cells as shown below.
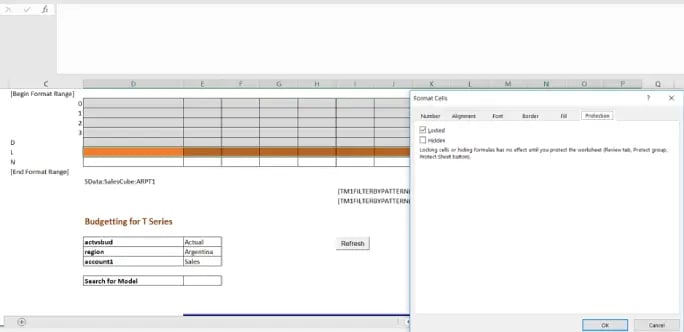
Hide rows and columns within active forms which are not meant for users, protect the sheet in review tab as shown below.
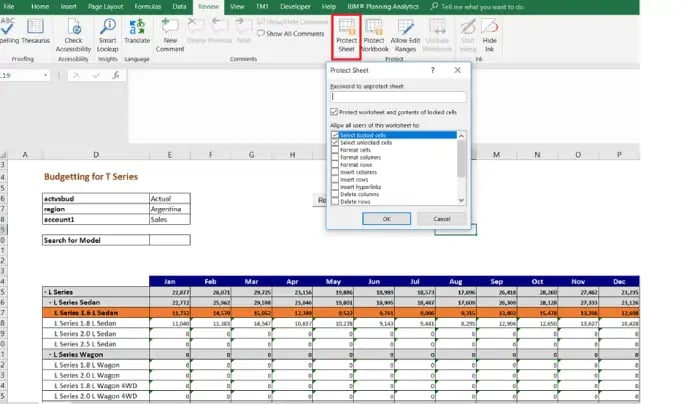
Hope you would have enjoyed reading this blog as much as I had testing these cool features; so until next time, keep planning on IBM Planning Analytics!
You may also like reading:
“ What is IBM Planning Analytics Local ”
“IBM TM1 10.2 vs IBM Planning Analytics”
“All you need to know about Planning Analytics 2.0.5”
“Little known TM1 Feature - Ad hoc Consolidations”
“IBM PA Workspace Installation & Benefits for Windows 2016”
“TI Optimisation – An Epilogue”
To Subscribe, visit http://blog.octanesolutions.com.au
For more Information: To check on your existing Planning Analytics (TM1) entitlements and understand “how to”, reach out to us at info@octanesolutions.com.au
Octane Software Solutions is an IBM Registered Business Partner specializing in Corporate Performance Management and Business Intelligence. We provide our clients advice on best practices and help scale up applications to optimise their return on investment. Our key services include Consulting, Delivery, Support and Training.
Octane has its head office in Sydney, Australia as well as offices in Canberra, Bangalore, Gurgaon, Mumbai, and Hyderabad.
To know more about us visit, OctaneSoftwareSolutions.
No matter how much we think we know about TM1, there are always these set of conditions that make you think “what-if there was a better way”??!! For example, not having to write a bunch of codes just to delete the subsets after using it in a Source View Or not writing the same area definition twice. What-if this could be done with less or no coding at all!
This blog and its subsequent part will focus on showcasing few of such many lesser known features in TM1. These little tricks and tips are a step towards better code management and of course peace of mind.
TIP 1. One area definition for two different rules at N and C level
Let’s take an example of Headcount in an Employee (HR Data) cube.
- Headcount is calculated monthly based on on-roll employee count in a particular month.
- However, if we pan-out at an All Months level (as illustrated in the figure below), total headcount adds up from Jan to Dec, which is not a true representation of employee count.
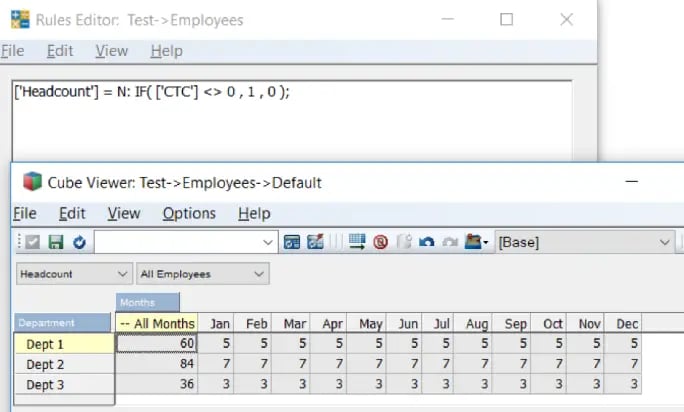
- Correcting this needs a rule to be written at a consolidated level which will pick the headcount from Dec.
- Instead of writing a separate line of rule with same Area definition, different rules can be clubbed and written for both N and C level separated by a semicolon (as illustrated in the figure below).
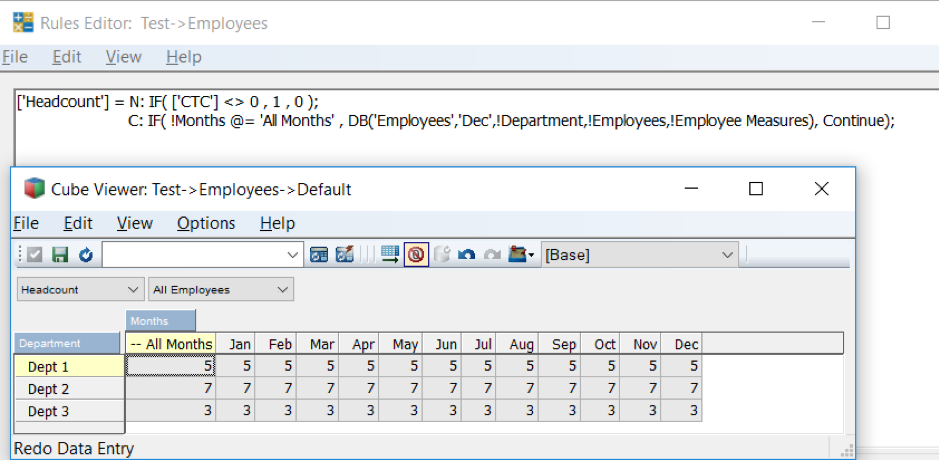
TIP 2. Error file directory
On any given day, you would hardcode the directory path or fetch it from a cube where the path is stored, this to ensure dynamism and to address issues with regards to data movement from one server to another.
But if you are not using this cube often or for any other purpose, it soon becomes redundant. There is a work around in which use of GetProcessErrorDirectory function offers the path and allows you to log into directory of respective server instances.
A folder inside logging can be created (as illustrated in the example below) and the file directed to that path, so even if/when the code is moved to different server/instance, it still works seamlessly.
Code snippet shows the use of function:

Exporting the exception to the file:
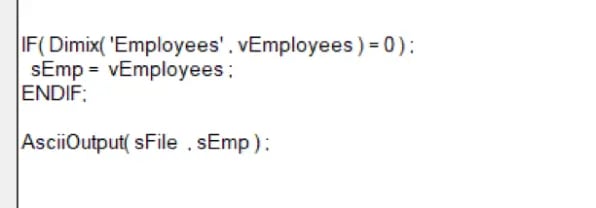
Output file:
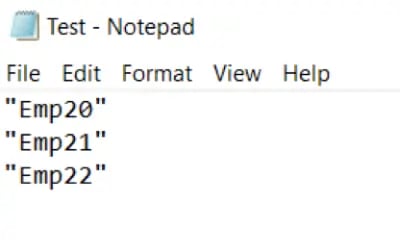
TIP 3. Temporary Subset and Views
In Turbo Integrator (TI), to process a cube view, it is a good practise to delete view and subsets created in Prolog to reduce redundancy. This is commonly done in Epilog tab of process using various functions.
But there is a much simpler way to delete views and subsets without the need of writing code in Epilog.
The screenshot below illustrates a code snippet, highlighted portion is the secret recipe; Adding “1” as the third parameter to functions ViewCreate, SubsetCreate or SubsetCreatebyMDX considers the views and subsets as temporary and deletes them once the process is completed.
This improves overall performance as deleted temporary objects can’t create lock, as a result of which TI doesn’t need to wait for locks to be released before executing a temporary object.
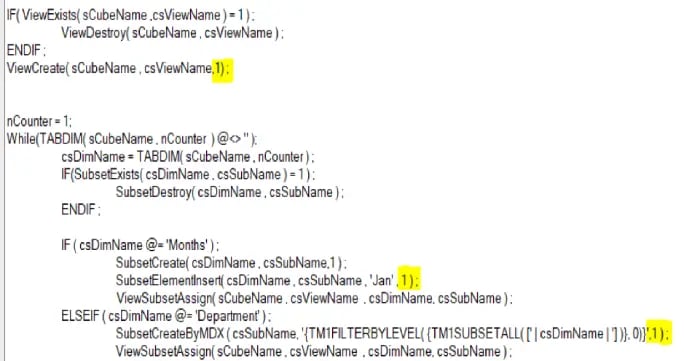
Note: These functions are available from 10.2.2 FP4 onwards.
Hope you would have enjoyed reading this blog as much as I had testing these cool features; stay tuned for Part B of this blog series on Lesser Known Facets of TM1. To Subscribe, visit http://blog.octanesolutions.com.au
You may also like reading:
“ What is IBM Planning Analytics Local ”
“IBM TM1 10.2 vs IBM Planning Analytics”
“All you need to know about Planning Analytics 2.0.5”
“Little known TM1 Feature - Ad hoc Consolidations”
“IBM PA Workspace Installation & Benefits for Windows 2016”
“TI Optimisation – An Epilogue”
For more Information: To check on your existing Planning Analytics (TM1) entitlements and understand “how to”, reach out to us at info@octanesolutions.com.au
Octane Software Solutions is an IBM Registered Business Partner specializing in Corporate Performance Management and Business Intelligence. We provide our clients advice on best practices and help scale up applications to optimise their return on investment. Our key services include Consulting, Delivery, Support and Training.
Octane has its head office in Sydney, Australia as well as offices in Canberra, Bangalore, Gurgaon, Mumbai, and Hyderabad.
To know more about us visit, OctaneSoftwareSolutions.
Welcome back, for those who had read Part A of this blog, hope you would have tested Parallel Interaction and benefitted from it. For those who haven’t, you can read it at http://blog.octanesolutions.com.au/caveat-around-concurrent-data-loads-part-a
This blog builds upon the previous one and focusses on improving performance by Parallel Interaction, it highlights TM1 facets worth consideration while an object is locking.
Synopsys
Tips towards improvements around support for concurrent read/write and/or parallel execution of turbo integrator process enabling higher efficiencies and productivity.
Analysis
- Declare unique view and subset names
This allows to run a Turbo Integrator process without locking when executed by concurrent users simultaneously.
- Establish Cube Dependency
This nullifies the chance of a query or process triggering a cube dependency; this usually happens during periods of user activity that may block objects and cause contention issues for concurrent reads and writes.
To establish a cube dependency, include AddCubeDependency function and valid only in the Turbo Integrator process. This function creates a manual dependency between two cubes in the model.
Syntax: AddCubeDependency('CubeA','CubeB');
|
Argument |
Description |
|
CubeA |
The name of the base cube. |
|
CubeB |
The name of the dependent cube. |
Cube B relies on a rule that is dependent on Cube A.
- Use a ViewConstruct function in Turbo Integrator processes
This will increase the speed of Turbo Integrator process as it stores a stargate view in memory on the server. The purpose of ViewConstruct function is to cache the view by pre-calculating and storing large views for quick retrieval post a data load or update.
Syntax: ViewConstruct(CubeName, ViewName);
|
Argument |
Description |
|
CubeName |
The cube from which you want to construct the view. |
|
ViewName |
The view you want to construct. This view must be an existing public view on the server. |
- Dimension Maintenance (or Dimension read/write)
This places locks on read and write operations in any cube that includes dimension updates. Thrashing may result in locks during dimension maintenance (read/write to dimensions) as part of executing the Turbo Integrator process.
Note: Do not include dimension maintenance as part of data upload or updates.
- Maintaining an Attribute (Alias)
This again places locks on read and write in any cube that includes dimension updates.
Thrashing may result in locks during dimension maintenance (read/write to dimensions) as part of executing the Turbo Integrator process.
Note: Do not include attribute alias maintenance as part of data upload or updates.
For more Information: To check on your existing Planning Analytics (TM1) entitlements and understand “how to”, reach out to us at info@octanesolutions.com.au.
Octane Software Solutions Pty Ltd is an IBM Registered Business Partner specializing in Corporate Performance Management and Business Intelligence. We provide our clients advice on best practices and help scale up applications to optimise their return on investment. Our key services include Consulting, Delivery, Support and Training.
Octane has its head office in Sydney, Australia as well as offices in Canberra, Bangalore, Gurgaon, Mumbai, and Hyderabad.
Get a free one-hour consultation on us
To know more about us visit, OctaneSoftwareSolutions.
In this blog, would like to introduce you to a new feature called "Compare Sandboxes"; this feature, an extension to Planning Analytics Workspace’s existing capability, shall be available both on Cloud and in Local versions.
What is a Sandbox? (Jump to “Feature Explained” section if you are an existing TM1 user & know this well)
A Sandbox lets you create your own personal workspace, your own version where you can enter & store data-value-changes without impacting the base (actual) data.
- A sandbox is not a copy of the base data, but a separate overlay or a layer of your own data values that you have entered on top of the base data.
- Sandboxed data is your own personal work area, its private to each user and cannot be seen by others.
- Once a sandbox is created, user can run multiple iterations on the data set without effecting the base data.
- When user commits the sandboxed data back into the base data, the changed values are then visible to others.
- Sandbox help user explore different business scenarios, for example, user may create best case, average case, worst case.
So, What’s new??
While “sandboxing” has been around for some while now, users have been asking (almost demanding) for a “Compare Sandbox” feature. This in essence is the possibility of comparing different scenarios (like best vs average vs worst) to help users analyse and drive better business decisions. This would also help streamline scenarios well before they are committed in the system.
Feature Explained:
As we now know, earlier versions of Planning Analytics (TM1) did not have an option where in users could compare different sandboxes, Now, users with entitlements to Planning Analytics Workspace (PAW) licenses can not only create personal scenarios in sandboxes but also view them side-by-side to compare and analyse the cause & its effect.
This was made possible as PAW considers Sandbox names as elements of dimension called Sandboxes (refer fig 1).
Figure 1
For illustration, you can now display your Best & Worst case sandbox scenarios next to each other in nested columns, and then, calculate the variance, as shown below.
In this example, we have two sandboxes Sri_BCase and Sri_WCase.
In Figure 2 Sandboxes are same as base data. BCase-WCase is on-fly calculation which gives variance between Sri_BCase and Sri_WCase.
Figure 2
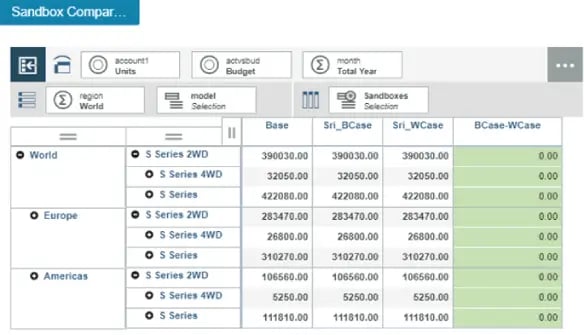
In Figure 3 Sandbox Sri_BCase, budgeted Units for S Series 2WD for world has been increased by 3%, Sri_WCase still holds base data. We can now see variance between Sandboxes in below figure.
Figure 3
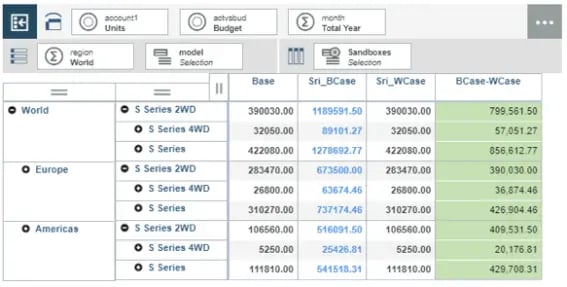
In Figure 4 Sandbox Sri_WCase, budgeted Units for S Series 2WD for world has been increased by 0.5%, Sri_BCase holds 5% increased data earlier. We can now see variance between Sandboxes.
Figure 4
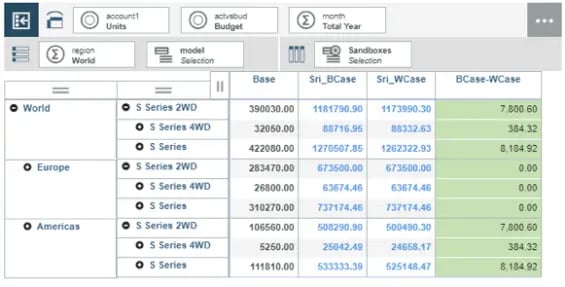
In Figure 5 this data can also be visualized using different graphs with in PAW. In this case Stack Bar has been used to Visualise data.
Figure 5
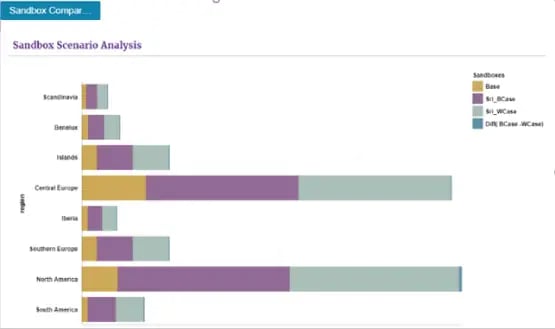
In Figure 6, we can also visualise the impact of these changes on other values like Sales, Price and other related measures.
Figure 6
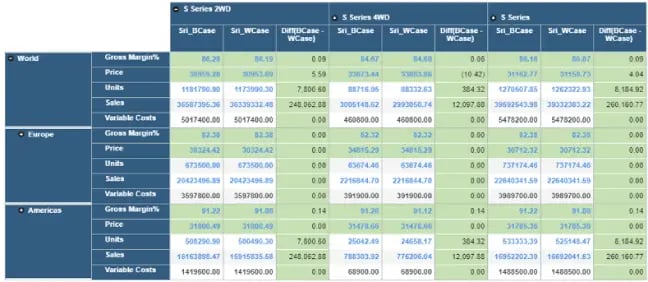
What would I like to see more
- Capability to spread data across multiple sandboxes.
- Capability to add members (new versions) to the Sandboxes dimension unlike the traditional way.
Frequent Feature refresh from IBM:
As a part of its continuous improvement program, IBM basis its Client's business requirement and requests has been adding features to PA Workspace. IBM published "Compare Sandboxes" feature in PA Workspace in its version 2.0.31 release. Some of the features from earlier versions are Create Virtual Dimensions on fly, Calculation on the fly, Sorting, Ranking etc.
Hope you would have enjoyed reading this blog as much as I had testing this cool feature; stay tuned for upcoming blogs.
You may also like reading “ What is IBM Planning Analytics Local ” , “IBM TM1 10.2 vs IBM Planning Analytics”, “Little known TM1 Feature - Ad hoc Consolidations”, “IBM PA Workspace Installation & Benefits for Windows 2016”.
For more Information: To check on your existing Planning Analytics (TM1) entitlements and understand how to upgrade to Planning Analytics Workspace (PAW) reach out to us at info@octanesolutions.com.au for further assistance.
Octane Software Solutions Pty Ltd is an IBM Registered Business Partner specialising in Corporate Performance Management and Business Intelligence. We provide our clients advice on best practices and help scale up applications to optimise their return on investment. Our key services include Consulting, Delivery, Support and Training.
Octane has its head office in Sydney, Australia as well as offices in Canberra, Bangalore, Gurgaon, Mumbai, and Hyderabad.
To know more about us visit, OctaneSoftwareSolutions.
In this weeks blog, our team make it our duty to shine some light on right tool your company can choose to meet your business needs. We will cover the much discussed benefits of installing and using IBM's Planning Analytics workspace on Windows 2016.
Contents
What is PA and PAW?

Planning Analytics ("PA") is the next version, or can be considered as the next generation of TM1. IBM enhanced TM1 functionality and features and embraced new tools to its' suite. This new enhanced TM1 has been rebranded as PA. IBMs PA has the best of BI, Watson, planning and analytic engines under one solution.
IBM Cognos TM1 which required trendy data presentation and visualization capability – a demand from Clients - has now been fulfilled by IBM. IBM has embedded Workspace to Planning Analytics, which is now called Planning Analytics Workspace ("PAW"). The below diagram gives a high level picture of new Architecture.
The following diagram shows where PAW fits into your IBM PA Local architecture:
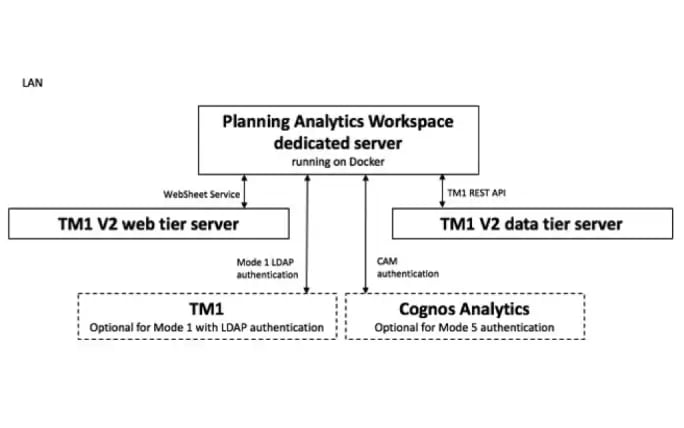
IBM PA Workspace
As a new face of the Cognos TM1/IBM Planning Analytics solution, IBM's PAW delivers a rich, interactive user interface where you can easily build analytical and planning applications or dashboards by combining cube views, web sheets, scorecards, and data visualizations. It is flexible enough to export to excel and publish the same data to workspace. And, you can now create dynamic reports via active forms for planning and budgeting, and gain insight and discovery via data visualisations from a very clean UX workspace and dashboard – even easily share content, reports and dashboards between users.
Highly Clean and Visual View-Based Interface: The interface is a highly visual, freeform design with over 25 charts, scorecards, images, shapes and many other options. You can easily synchronize data between different objects (cube views, web sheets etc.)
On Premise and On Cloud: An amazing innovation is Planning Analytics Workspace (PAW) and its two variants. One, being on premise called Local. And the other, is cloud based referred as on Cloud.
It is a data rich tool, that can show data from all different cubes, to meet business needs: PAW is also view-based, which means you can import multi-dimensional data into a workspace and then it effectively converts and displays it as a chart to map your visualisations (whether it is a bar graph, scatter graph, line graph or so forth).
Easily share between hundreds of users: PAW is a highly interactive viewer that makes it easy to swap data exploration to charts. The main advantage of a drag and drop workspace, unlike some other platforms that require you to write the rule for reports yourself, is that business users can easily build and share their own reports and dashboards.
Support Analysis, Reporting and Write-back features: So for example if you require write-back or what-if analysis of data, or need the aggregate data from high-volatility APPs in real-time, users can benefit from PAs consistent performance and tightly controlled latency of cached and non-cached data.
Mobile Compatibility: Workspace is mobile and can be accessed from tablets and iPads! Aside from supporting all your web interfaces such as Chrome, Safari, Explorer and Mozilla, you can even access work on the go from meeting to meeting, with mobile compatibility access. This full service analytics solution supports faster loading and scrolling for both web and cloud interfaces that enables high performance across WAN wireless access networks, and has iPad mobile compatibility.
Fast Querying and Loading Time: A T1 debugger in PA now uses a TM1 server as part of the back end. This means whether you are on a web browser or cloud interface there are less latencies and errors in querying, building or visualising reports, as opposed to traditional BI engines. Loading time is two (2) to four (4) times faster.
PAW comes with the above features and more such as combing additional highly versatile visualization features.
What makes your additional visualisation plugins unique with IBM PAW is that it does not require additional add-on licenses!
PAW Installation
On the other hand, the installation of PAW is not as smooth sailing as a TM1 or Cognos BI installation. PAW needs an additional software called Docker to be setup before installing PAW. Once docker is installed and ready to use, the next step is PAW installation.
The following diagram shows where Planning Analytics Workspace fits into your IBM Planning Analytics Local architecture:
Installation Workflow
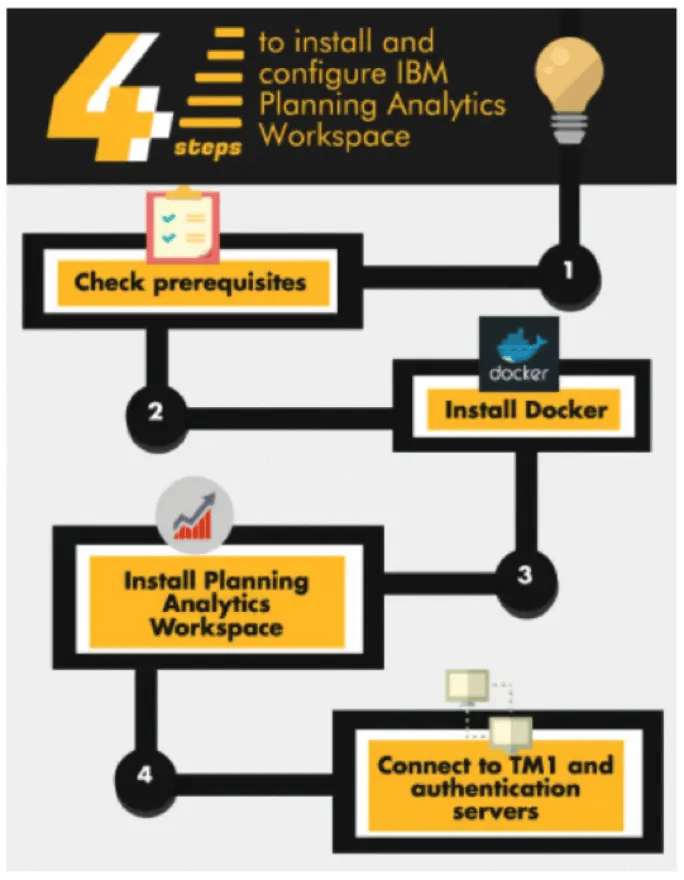
Though the installation process looks simple, this needs technical manual assistance to fix issues and make installation and configuration a success.
If not all TM1 Experts, at least 98% of technical consultants who would have tried to upgrade from TM1 to PA, whilst installing PAW, would have encountered below error.
Fixing this issue may cause delay in upgrading your system. It may also incur costs to fix this issues in non-prod environment. Once the non-prod is fixed, an outage or planned reboot, as well as BIOS changes are musts to fix the prod environment.
Benefits of PAW on Windows 2016
PAW for Windows 2016 has been available since June 2, 2017 ( 2.0.21).
Let us consider your clients business objectives for a second. Your companies strategy and technolocy benefits from embacing business intelligence trends that has been made available via systems such as the new PAW package support for Windows 2016 OS.
Again, docker is a must for getting PAW installed and configured on Windows 2016. The docker used here is not a native docker but a different docker called docker EE.
What’s the Gain with PAW for Windows 2016 OS?
Microsoft has come long way with confounding features. The most versatile features, we would say, are:
- Nano Server: A Nano Server boasts a 92 percent smaller installation footprint than the Windows Server graphical user interface (GUI) installation option.
- Containers: Docker-based containers to Windows Server.
- Linux Secure Boot: Deploy Linux VMs under Windows Server 2016 Hyper-V with no trouble without having to disable the otherwise stellar Secure Boot feature.
- Storage Replica and ReFS: ReFS is intended as a high-performance, high-resiliency file system intended for use with Storage Spaces Direct and Hyper-V workloads.
- Storage Spaces Direct: More affordable for administrators to create redundant and flexible disk storage.
- Nested Virtualization: Nested virtualization refers to the capability of a virtual machine to itself host virtual machine. Nested virtualization makes sense when a business wants to deploy additional Hyper-V hosts and needs to minimize hardware costs.
- Hyper-V Hot-Add Virtual Hardware: We can now "hot add" virtual hardware while VMs are online and running.
Gain for PA and PAW Administrators
- The first and foremost advantage is that there is no need to have a Virtualize active in VMWARE.
- As there is no need to activate Virtualization, physical server is not required instead a VM can be used for the PAW. Thus reducing not just the cost involved with money but also the time and effort must be counted.
- Embracing new Windows OS with new features means that you can be rest assured in regards to the performance and availability of PAW – which was not the case with TM1 10x.
- Storage Replica is an amazing feature in Windows 2016, this helps during failovers and quit turnaround at critical times.
- All leading to reduced expenses.
Contact one of Octane Software Solutions specialists for an upgrade made easy today!
Planning Analytics is one of the reasons that makes IBM a market leader performance management quadrant.
- We are experts in this Cognos TM1 technology, having extensive experience in upgrading TM1 from older versions to newer Versions.
- Migrated our client’s system from IBM TM1 9x and 10x versions to new trending technology called Planning Analytics TM1.
- Installed Planning Analytics Workspace and integrated with Planning Analytics.
- Installed, configured Planning Analytics with Planning Analytics Workspace on Windows 2016, other Windows OS, AIX, Linux.
You may also like reading blogs “ What is IBM Planning Analytics Local ” , “IBM TM1 10.2 vs IBM Planning Analytics”
Who are Octane Software Solutions?
Octane Software Solutions is an official IBM Business Partner. We specialise in performance management solutions including on-shore and off-shore TM1 delivery. We provide our clients advice on best practices in Business Intelligence and scaling up applications to optimise your return on investment. By working with Octane you do not need to compromise on delivery, support, expertise, and training for end-to-end solutions that are cost effective as well as competitive.
For more details, please visit: www.octanesolutions.com.au
Srinivas is a Senior Technical Consultant at Octane Software Solutions. Learn more about Srinivas via LinkedIn.
we go the extra mile so you can go the distance|
Got a question? Shoot!
Lorem ipsum dolor sit amet, consectetur adipiscing elit, sed do eiusmod tempor incididunt ut labore et dolore magna aliqua.


.png)
.png)


.png?width=673&height=371&name=IBM_Gold-removebg-preview%20(1).png)
Leave a comment